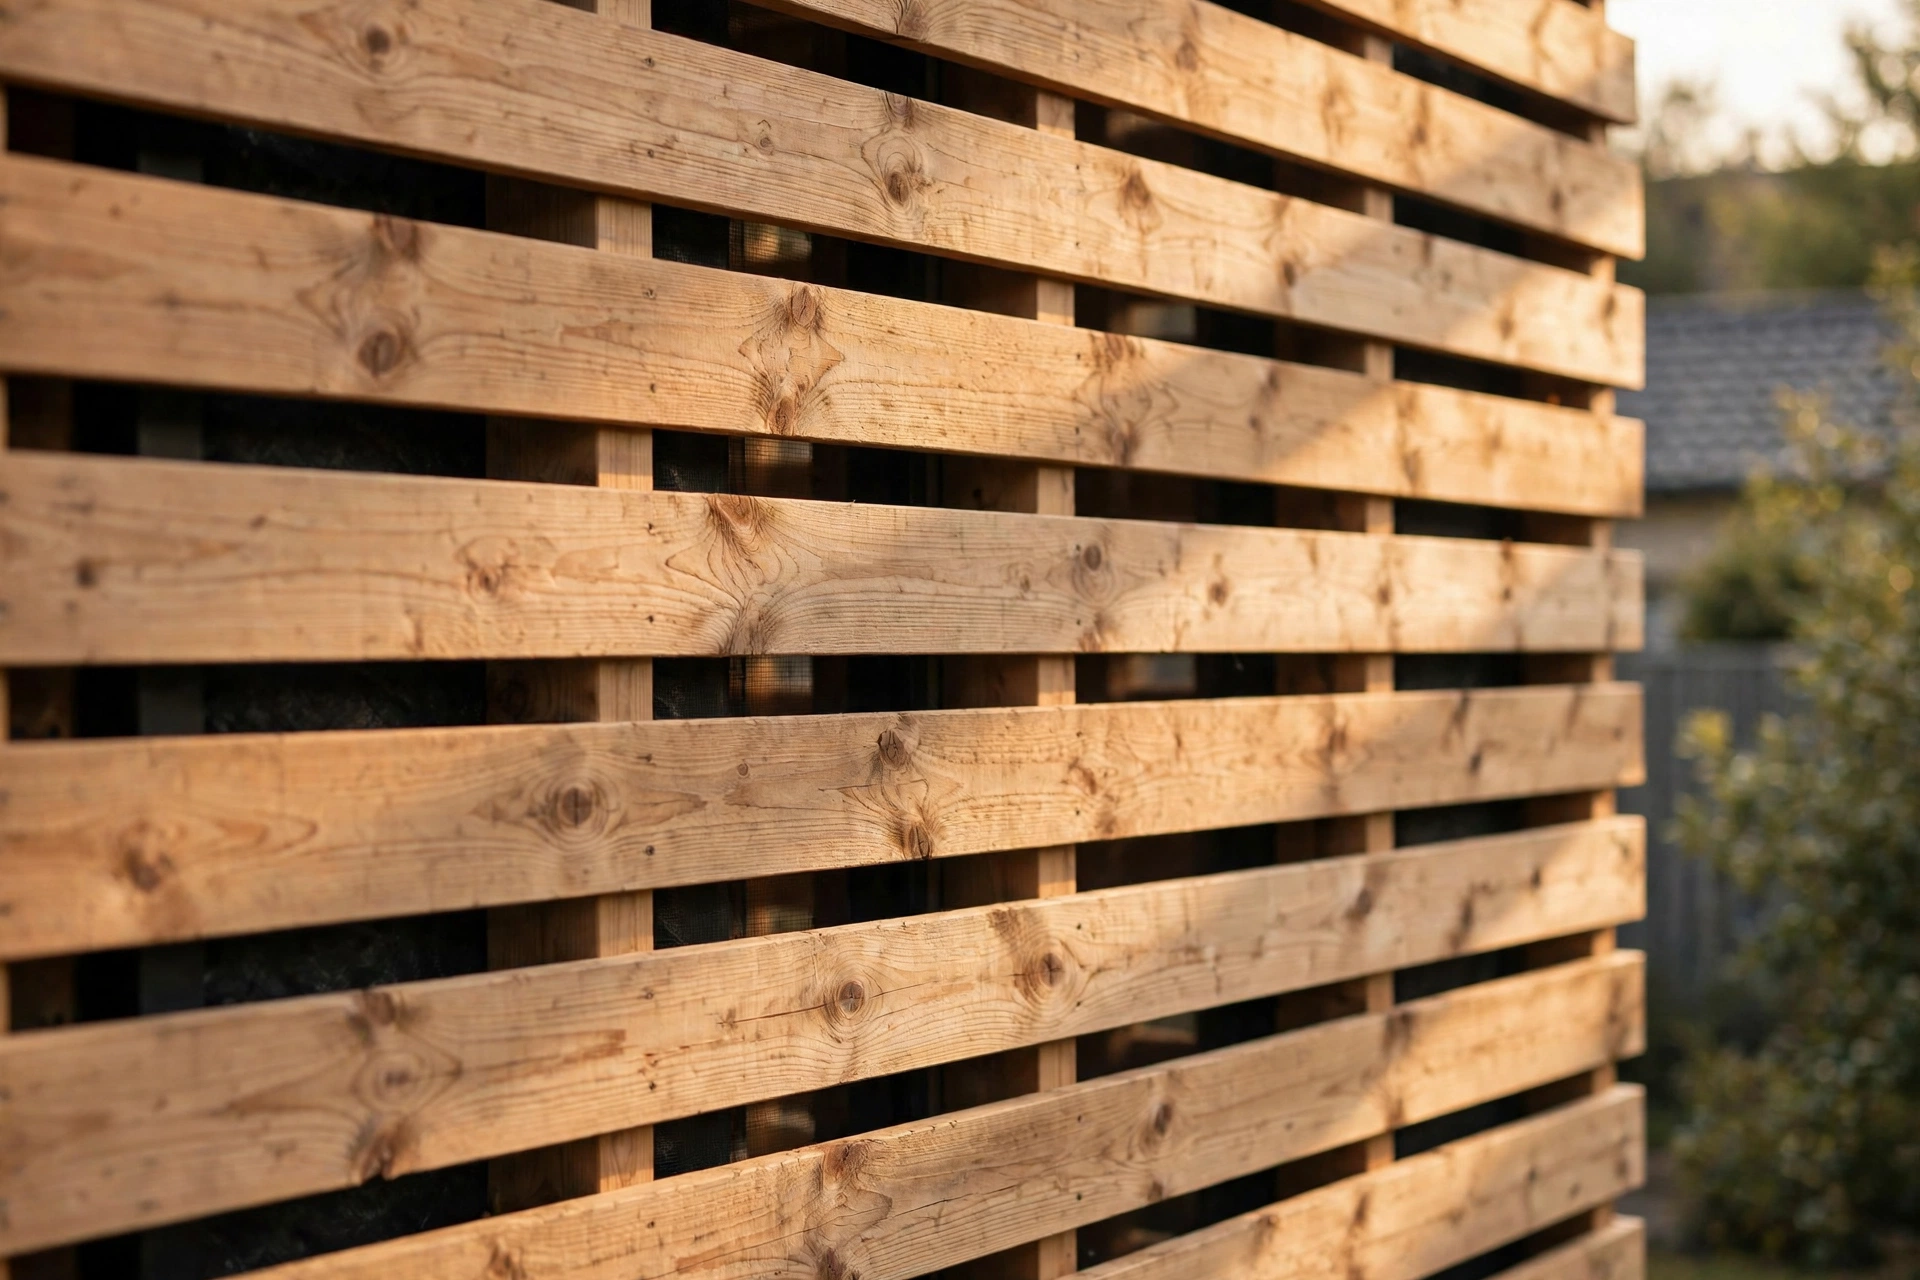
Timber cladding gives a home a warm, natural character, but timber is hygroscopic, which means it constantly absorbs and releases moisture from the air around it. Most cladding systems are not fully waterproof: wind-driven rain, condensation and capillary action push water through joints and fixings. The wood cladding ventilation gap is the drained, ventilated cavity left between the back of the boards and the wall, and it is what stops that moisture from becoming trapped. Without it, battens and board backs stay damp and rot, cupping and coating failure follow. This guide covers recommended gap depths, how rainscreen systems work, and correct detailing for horizontal and vertical timber cladding.
Quick Answer: How Wide Should the Wood Cladding Ventilation Gap Be?
For residential timber cladding, the widely accepted rule is a drained and ventilated cavity at least 25mm deep behind the boards, open at the top and bottom of the wall so air can flow through. The Timber Decking and Cladding Association (TDCA) describes 25mm as the minimum and 38mm or more as typical; some rainscreen manufacturers specify 30mm, and certain system approvals require 50mm. Leave at least 10mm of clear opening at the base and head of the cladding, screened with insect mesh, and never fill the cavity with insulation or seal it shut. Always check the cladding manufacturer’s instructions, since exact requirements depend on the product, site exposure and local building rules.
Why Timber Cladding Needs a Ventilation Gap
Timber constantly exchanges moisture with its surroundings as it seeks equilibrium moisture content, and this cycle makes the wood shrink and swell. When the back of a board stays wet, sustained moisture content above roughly 20% creates the conditions in which wood-decay fungi thrive, and repeated wetting and drying across the two faces causes cupping, bowing and surface checking. Moisture pushing out from behind the board also breaks the bond with paint or stain, so coatings fail early, and the battens, which sit in the dampest part of the assembly, rot without ventilation to dry them.
How a Rainscreen System Works
A rainscreen does not try to be waterproof. The cladding sheds the bulk of wind-driven rain while the ventilated cavity behind it manages the rest, through drainage and drying. Gravity pulls water that gets past the boards down the back of the cavity to the base, where it drains out. Meanwhile the inlet and outlet principle drives airflow: cool air enters at the base, warms against the wall, rises through the cavity and exits at the head, carrying moisture vapour with it. This continuous movement, driven by wind pressure and the stack effect, dries the boards and battens, while a vapour-permeable breather membrane behind the battens acts as a final water barrier that still lets vapour escape from the wall build-up.
Recommended Ventilation Gap Depths Explained
For most houses in sheltered or moderate exposure, 25mm is the accepted minimum and the figure most installers work to. Specifying 38mm or more is common on exposed coastal or hilltop sites and on taller buildings with higher wind-driven rain loads. When in doubt, go deeper rather than shallower, and treat the manufacturer’s stated minimum as exactly that, a minimum.
Horizontal Cladding: Batten Detailing
Horizontal boards are the most common arrangement, and the detailing is straightforward because vertical battens naturally create a clear vertical air path. Fix pressure-treated softwood battens vertically to the wall at no more than 600mm centres, keeping them plumb and level and using packers where the wall is uneven. The battens set the cavity depth, so their thickness should be at least 25mm, and as a practical rule at least one and a half times the thickness of the cladding boards, which keeps enough timber for the fixings to bite into.
Leave the cavity open at the bottom and top of the wall, screening both openings with insect mesh or perforated closures rather than solid timber. Seal all cut board ends with an end-grain sealer before fixing, and use stainless steel fixings throughout.
Vertical Cladding: Counter-Batten Detailing
Vertical cladding needs extra care because horizontal battens run across the airflow and block it. The industry-standard solution is counter-battening: fix a first layer of horizontal battens to the wall, then fix a second layer of vertical counter battens over them. The cladding boards fix to the vertical layer, and the gap between the two batten layers forms a continuous vertical void that air can move through from base to head.
Use purpose-made sloped horizontal battens or ventilation strips for the first layer where possible, since flat horizontal battens can trap water. Counter-battening roughly doubles the batten material and typically brings the total cavity to 38-50mm, which is why vertical cladding detailing often lands at the deeper end of the guidance.
Insect Mesh and Cavity Protection
Every opening into the cavity needs protection, or birds, rodents and large insects will move in. Fit vermin mesh at the base, head, and around windows, doors and other penetrations: fine woven stainless or aluminium mesh keeps out birds and rodents, though no mesh can exclude the smallest insects, so the goal is to stop nesting and blockage. Perforated metal closures combine mesh and air gap in one tidy detail. Just as important is what not to put in the air path: never run breather membrane, insect mesh or OSB between the outermost batten and the boards, because these materials choke the airflow the system depends on.
Flashing and Weatherproofing at Openings
Windows, doors and other openings are where most cladding leaks begin. Install head flashings above every opening to kick water clear of the wall, and lap the breather membrane over the flashing upstand so water drains onto, not behind, the flashing. Sill flashings should project past the cladding face with a drip edge.
Stagger board joints across the facade rather than lining them up, keep fixings at least 20mm in from board ends to prevent splitting, and seal every cut end with end-grain preservative. Through-fixing into the batten is the most secure method for timber cladding, and the breather membrane behind the battens should be continuous and properly lapped, since it is the last line of defence if wind-driven rain crosses the cavity.
Ground Clearance and Base Details
The bottom of the wall takes the hardest punishment from splash-back, soil moisture and standing water. Keep the lowest cladding board well clear of the ground: 150mm is widely treated as the minimum, and 300mm is the safer recommendation. Keep the cavity’s bottom opening clear of soil, mulch and debris so water can drain out and air can enter, and never let paving, decking or raised beds bury the base of the cladding.
Choosing Timber Species and Durability
The ventilation gap protects every species, but some timbers tolerate moisture better than others. Western red cedar, Siberian larch and oak are popular for cladding because of their natural durability, while thermally modified timbers offer improved stability and decay resistance. Whatever the boards, use pressure-treated softwood battens rated for Use Class 3 (exterior use above ground, exposed to weather), since battens live in the dampest part of the assembly.
Timber should arrive on site at around 16% moisture content, give or take 4%, and be stored flat, off the ground and under cover before fixing. One detail that catches people out: timber is naturally acidic, with a pH typically between 3 and 5, and acidic runoff corrodes zinc and standard galvanised fixings, so use stainless steel fixings for the boards and battens.
Inspecting and Repairing Existing Cladding
If cladding was installed without a proper ventilation gap, or the gap has become blocked, the warning signs usually appear at the most exposed areas first. Look for boards cupping or bowing, blackening at board ends, paint or stain peeling, soft battens visible at the base, and insect or bird activity at openings. Probe suspect battens gently with a screwdriver: sound timber resists, while decayed timber lets the point sink in.
Clear any blocked base or head vents of debris, soil and vegetation, and check that the mesh is intact. Where battens have rotted but the wall behind is sound, the affected boards can be removed and the battens replaced, restoring the cavity. Where rot has reached the sheathing or framing, or boards were fixed directly to the wall across a whole elevation, a full re-clad with a proper rainscreen build-up is usually the lasting fix.
Common Mistakes That Block or Bypass the Ventilation Gap
- Fixing boards directly to the wall or to OSB sheathing, leaving no cavity.
- Filling the ventilated cavity with insulation, turning drainage space into a wet sponge.
- Sealing the cavity shut at the top or bottom with solid timber or sealant.
- Using horizontal battens under vertical cladding without counter battens, so air cannot rise.
- Placing membrane, OSB or mesh between the outer batten and the boards, choking the air path.
- Leaving cut board ends unsealed, letting end grain wick water deep into the board.
- Using galvanised or zinc fixings with acidic timber, causing corrosion and staining.
- Burying the base of the cladding in soil, paving or mulch.
Cost Considerations
Adding a proper ventilated cavity is one of the cheapest parts of a cladding project, and skipping it is one of the most expensive mistakes: replacing rotted battens and boards on even one elevation can easily exceed the saving. All prices are estimates; actual prices vary by region, supplier and project size, so treat them as a budgeting guide and get local quotes.
Safety and When to Call a Professional
Cladding work involves working at height, and falls remain one of the biggest risks in home improvement. Use properly erected scaffolding or a stable tower for anything above ground-floor level rather than stretching from a ladder, and wear gloves, eye protection and a dust mask when cutting or sanding treated or modified timber. Call a professional when the project involves multiple storeys, when fire performance and cavity barriers are a regulatory requirement, when the wall behind the cladding is structurally damaged or extensively rotted, or when the building is listed.
Final Thoughts
The ventilation gap is the quiet hero of every timber-clad wall: invisible once the job is done, but decisive for how long the cladding lasts. Keep the cavity at least 25mm deep, open at the top and bottom, screened against pests and free of anything that blocks airflow, and detail vertical cladding with counter battens. Before ordering materials, read your chosen manufacturer’s installation guide end to end and confirm the cavity depth, mesh details and fixing specification in writing.
Frequently Asked Questions
What is the minimum ventilation gap behind timber cladding?
For most residential timber cladding, 25mm is the accepted minimum cavity depth, with 38mm or more typical on exposed sites and taller buildings. Some system approvals require 50mm. The cavity must be drained and ventilated, with clear openings of at least 10mm at the base and head of the wall.
Can I install timber cladding without a ventilation gap?
No. Direct-fixing boards to the wall traps moisture behind them, and most manufacturers will void their warranty if the specified cavity is omitted. Without ventilation, moisture content climbs, leading to rot, cupping and coating failure, often within a few years on exposed elevations.
Should the ventilation gap be open at the top as well as the bottom?
Yes. The system relies on the inlet and outlet principle: air enters at the base, rises through the cavity as it warms, and exits at the head, carrying moisture vapour with it. Sealing either end stops the airflow. Screen both openings with insect mesh.
Do I need insect mesh in the ventilation cavity?
Yes, fit vermin or insect mesh at every cavity opening, including the base, head and around windows and doors. It stops birds, rodents and large insects from nesting in the cavity. Even fine mesh cannot exclude the tiniest insects, so combine mesh with regular inspection to keep the vents clear.
How do you ventilate vertical timber cladding?
Vertical boards need counter-battening. Fix horizontal battens to the wall first, then fix vertical counter battens over them, and fix the boards to the vertical layer. The space between the two batten layers forms a continuous vertical air path. Never fix vertical boards to horizontal battens alone, because the battens dam the airflow.
What happens if the ventilation gap gets blocked?
Blocked vents stop air movement, so moisture accumulates and timber moisture content rises. Early signs include cupping boards, peeling coatings and musty smells at the base of the wall. Clear debris from the base and head openings, check that the mesh is intact, and probe the battens for softness. If battens have rotted, replace them and restore the cavity.
Does a breather membrane replace the ventilation gap?
No. A breather membrane and a ventilation gap do different jobs and you need both. The membrane sits behind the battens as a vapour-permeable water barrier protecting the wall, while the cavity in front of it drains liquid water and dries the boards and battens. One cannot substitute for the other.