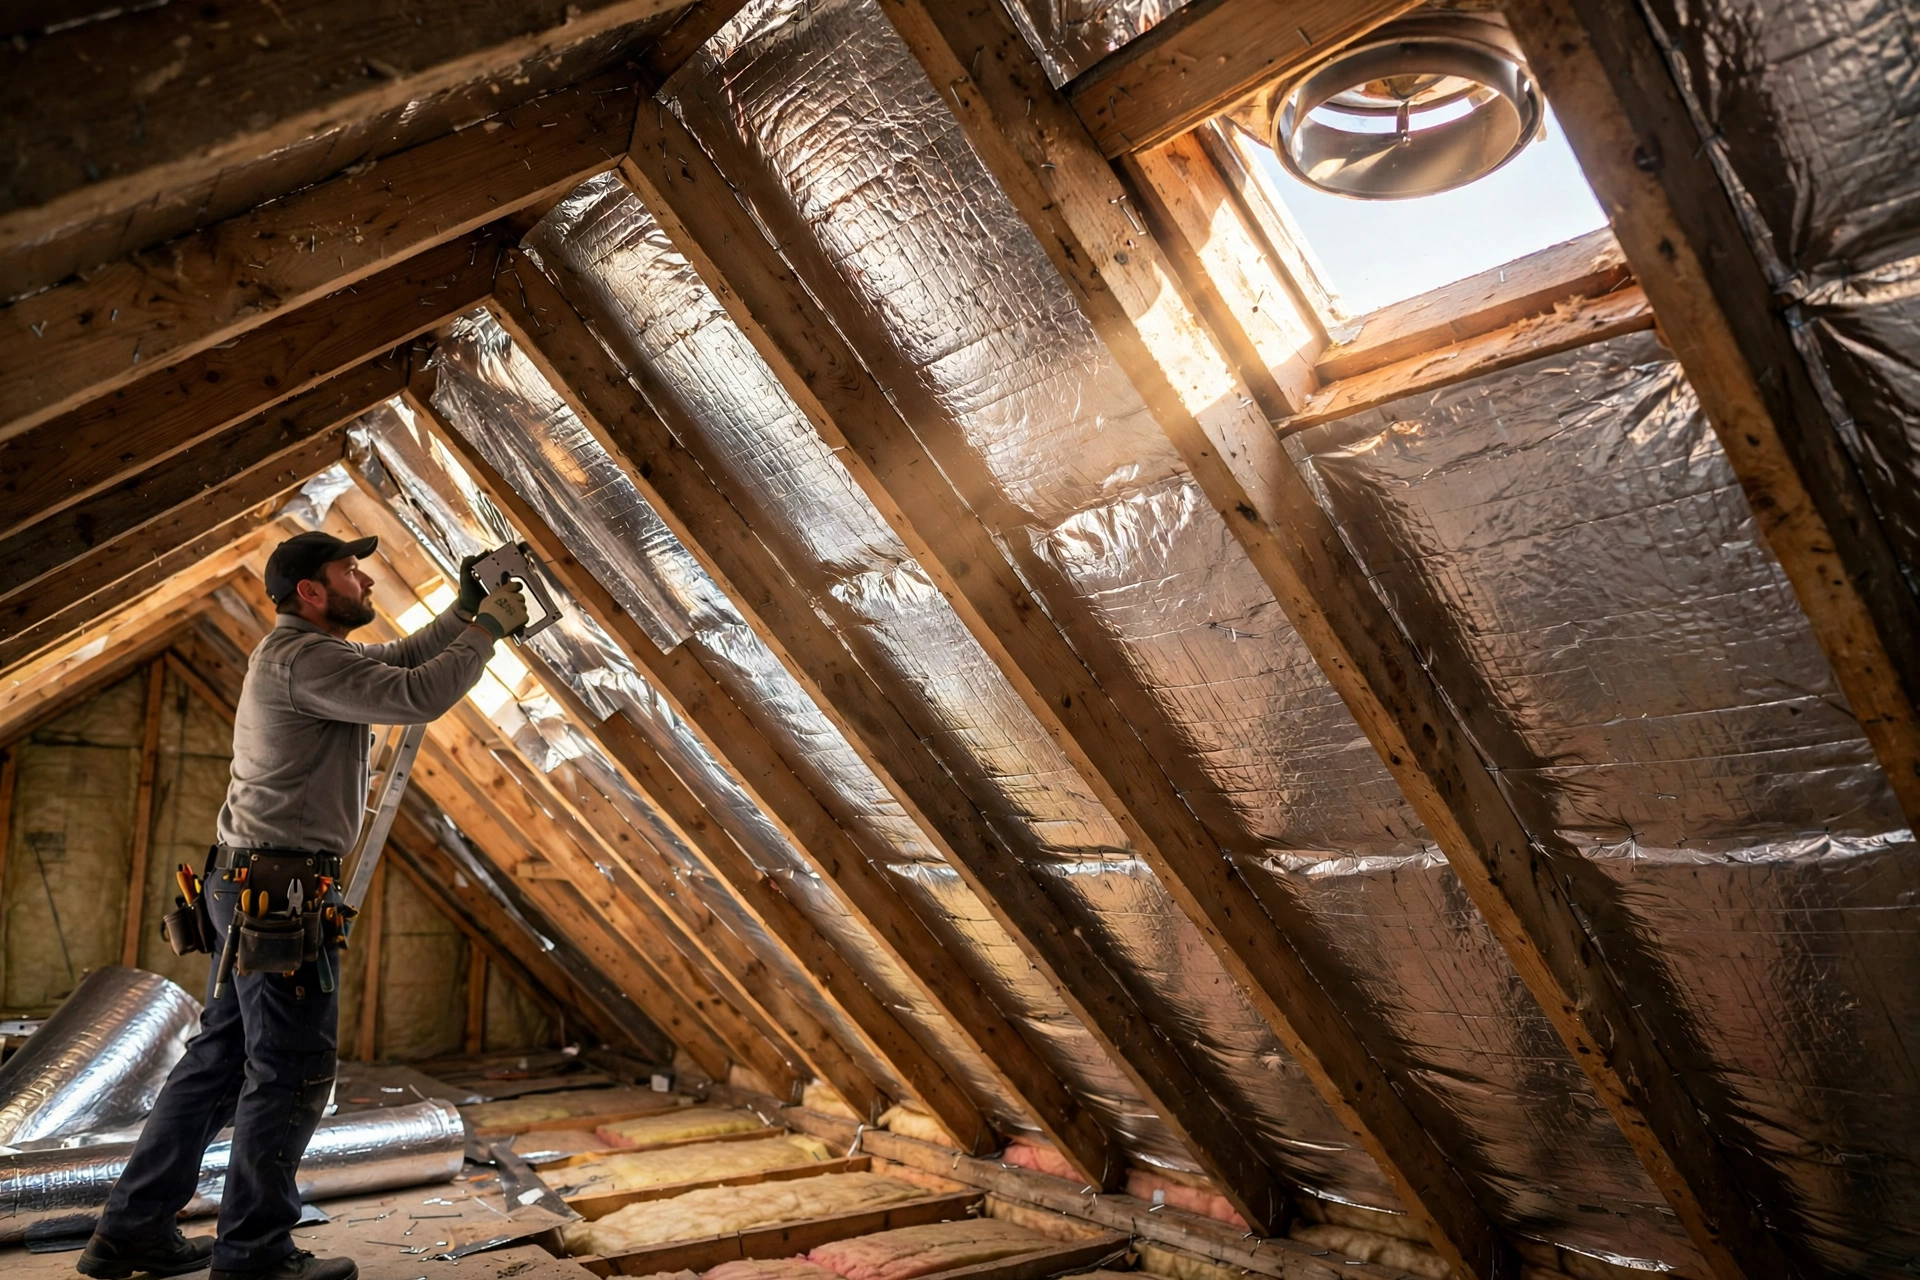
A radiant barrier does not insulate a roof the way most homeowners expect. It carries no R-value and does not slow heat creeping through solid material. Instead, it turns back the invisible infrared energy that a sun-heated roof sends downward — and only when its shiny face looks across an open pocket of air. Installed well, in the right house and climate, it can cut radiant flow across an attic cavity substantially and take a noticeable edge off peak attic temperatures.
Why Roof Assemblies Gain So Much Heat on a Sunny Afternoon
A roof faces the sun for more hours, and at a more direct angle, than any other part of a house. Dark shingles absorb much of that energy and pass it into the decking beneath. Heat then moves by conduction through the wood, by convection in attic air, and by radiation across the open cavity between deck and attic floor. Radiation needs no contact, which is why it surprises homeowners. U.S. Department of Energy guidance cited by installers puts radiant heat at up to about 93% of summer heat gain through roof assemblies. The load peaks on dark-shingle, highly sun-exposed roofs between noon and late afternoon, when the deck is hottest and air conditioning works hardest.
How a Radiant Barrier Interrupts Infrared Flow Across an Attic Air Cavity
Picture the attic as a wide, shallow box: the lid is the underside of the roof deck, heated by the sun, and the floor is the top of the ceiling insulation. Infrared energy crosses the air between them freely. A radiant barrier changes that ending. Its foil face, typically with reflectivity of 95% or greater and emissivity typically of 0.03 to 0.1, sends most incoming infrared back toward the deck. A low-emissivity surface gives off very little of the heat it absorbs, so the foil stays cooler than bare wood and the cavity below stays cooler too. That only works if the reflective face looks across open air, typically a gap of one-half inch to one inch. If foil is sandwiched directly against wood or insulation, heat moves by conduction and the reflective benefit falls toward zero. Studies show radiant transfer across the cavity cut by roughly 50 to 90%, peak attic temperatures down by roughly 8 to 30 degrees Fahrenheit, and cooling energy down by roughly 5 to 10% during peak sun.
What the Foil, Backing, and Perforations Actually Do Inside a Roof Assembly
Most residential radiant barriers are aluminum foil laminated to kraft paper, plastic film, or a fibrous backing. The foil supplies reflectivity and low emissivity; the backing supplies the strength to staple and handle it without tearing. A single-sided product has foil on one face, so orientation matters — the foil must look across the air space toward the heat source. A double-sided product is foil on both faces, which removes the orientation question but not the air-gap requirement. Perforated foil lets trapped moisture vapour pass through, reducing condensation risk where a solid sheet might seal vapour into the assembly.
- Single-sided foil: the foil face must look across the air gap toward the hot roof deck.
- Double-sided foil: reflective on both faces, so orientation is simpler, but the air gap is still essential.
- Perforated foil: tiny holes let trapped moisture vapour pass, helping to avoid condensation.
- Backing: kraft paper, plastic film, or fibrous backing gives the foil handling strength.
Comparing Rafter Stapling, Foil-Faced Sheathing, and Attic-Floor Placement
Stapling foil to the underside of attic rafters is the most common retrofit. The foil is unrolled along the rafters, reflective side facing the air space, and stapled in place with a gap to the deck above. It needs no roof removal, but low-pitch attics and crowded ductwork make the work slow, and every seam is a place where careless work leaves a gap. Foil-faced sheathing — OSB or plywood with foil laminated on one side — is the reroofing and new-construction method, installed like standard decking with the foil side facing down into the attic, never up toward the shingles, and small gaps left between panels for expansion. It is only practical when the deck is already exposed. Laying foil over attic floor joists is simplest and most vulnerable to dust, so it is usually a secondary option.
| Method | Best timing | Reflective face | Main watch-out |
|---|---|---|---|
| Stapled to rafters | Retrofit, from inside attic | Facing attic air space | Tight access and seams |
| Foil-faced sheathing | Reroofing or new build | Foil side down | Only when deck is exposed |
| Foil over floor joists | Simple retrofit | Facing up to roof deck | Dust settles on foil |
Keeping the Air Gap Open: The Detail That Decides Whether the Foil Works
A radiant barrier without an air space beside its reflective face is not a radiant barrier in any functional sense. The gap need not be large — typically one-half inch to one inch is enough — but it must be real, continuous, and maintained after the installer leaves. Foil that sags onto the deck, foil pressed flat by insulation stuffed against it, and foil stapled so tightly that it touches the rafters all lose the space they need. Good work leaves the foil taut, with the gap visible along the run and overlaps lapped without closing it. The same rule keeps bulk insulation in its own zone, on the attic floor, while the barrier stays at the rafters or on the deck. Pushing insulation against the foil merges the two layers into a conductive sandwich and defeats both.
Pairing Radiant Barriers With Bulk Insulation and Attic Ventilation
A radiant barrier is always used with bulk insulation, never as a substitute. Bulk insulation such as fiberglass, cellulose, or foam resists conductive and convective flow, slowing warmth moving through solid material and air currents. The barrier controls radiant transfer across the cavity. Remove the bulk insulation and the house still gains heat by conduction; remove the barrier and the attic still pours infrared energy onto the insulation, which must then resist a larger load than it was sized for. Ventilation completes the system: when the barrier reflects infrared back toward the deck, that energy needs an exit outdoors. Soffit vents low down and ridge or gable vents high up create a natural path, with cooler air entering at the eaves and warm air leaving at the ridge, taking deflected heat with it. Ventilation should therefore be checked before the foil goes up.
- Air-seal the attic floor first, so conditioned air does not leak into the cavity.
- Keep bulk insulation at its intended depth on the attic floor, clear of the foil and its air gap.
- Confirm soffit and ridge ventilation are open and unblocked before installing foil.
- Protect ductwork in the attic, since ducts in a hot cavity lose cooling energy before it reaches the rooms.
Where Radiant Barriers Pay Off Fastest and Where They Barely Move the Needle
Climate is the largest single predictor of payoff. The strongest return is in hot, sunny regions, where roofs spend long hours under intense sun, attic temperatures climb sharply, and air conditioning runs for much of the day. Dark shingles, a large roof area, and a west- or south-facing slope all push the payoff higher, because each increases the infrared energy the barrier intercepts. In cooler climates the contribution is usually much smaller and may not justify the cost: summers are shorter, sunshine is weaker, and the radiant load is modest, so there is simply less heat to turn back. A house there may still benefit from air sealing and bulk insulation, which pay back year-round. Installing under shingles is most practical during a roof replacement, when foil-faced sheathing can be fitted as part of the decking work.
Fire Ratings, Building Codes, and Reroofing Timing for Radiant Barrier Work
Before specifying any radiant barrier, check its fire rating and the local building code. Foil products differ in backing material and in flame-spread and smoke-development classification, and a product acceptable in one jurisdiction may need a different rating elsewhere. The data sheet should carry the rating, and the local building department can confirm whether a barrier is permitted at the rafters, on the deck, or over the floor. If a roof replacement is planned within a few years, it is usually worth waiting and fitting foil-faced sheathing as part of that job, rather than paying for a rafter retrofit now and disturbing it during the reroof. Attic work carries real risks — heat, low headroom, exposed nails, and stepping through a ceiling — so a full installation in a hot, low-pitch attic is a job for a professional crew. A professional should also be called in where the roof has a history of leaks or condensation, where attic wiring is old or unclear, or where the barrier must be fitted around chimneys, flues, and recessed lights needing clearance.
Measuring the Difference After Installation Without Guessing
A single cooling bill is a poor way to judge a radiant barrier, because weather, occupancy, and thermostat settings all move at once. A better check is attic temperature, measured the same way before and after installation on comparable sunny afternoons. A simple data-logging thermometer near the attic floor, away from direct contact with the foil, can record peak temperatures over several days. If the barrier is working, the peak should fall; the study range of roughly 8 to 30 degrees Fahrenheit gives a sense of what a good result looks like. If the temperature log does not change, the installation deserves a second look — the foil may face the wrong way, the air gap may have closed, or the house may simply have had a smaller radiant load than expected.
| What was measured | Reported range | When it applies |
|---|---|---|
| Radiant transfer across cavity | Cut by roughly 50 to 90 percent | Barrier with an open air gap |
| Peak attic temperature | Down roughly 8 to 30 degrees Fahrenheit | Sunny afternoons, exposed roofs |
| Cooling energy | Down roughly 5 to 10 percent | During peak sun |
| Radiant share of summer roof heat gain | Up to about 93 percent | U.S. DOE guidance cited by installers |
Radiant Barrier Questions Homeowners Ask Before Choosing a Roof Assembly Strategy
Does a radiant barrier replace attic insulation?
No. A radiant barrier has no R-value and does not resist conductive heat flow, so it cannot take the place of bulk insulation such as fiberglass, cellulose, or foam.
Which way should the foil face when it is stapled to the rafters?
The reflective face must face the open air space, looking toward the hot roof deck above it — in a rafter mount, down into the attic, with a gap of typically one-half inch to one inch between foil and deck. Foil pressed flat against wood loses its reflective benefit, because heat then moves by conduction through the contact.
Can a radiant barrier be installed during a reroof?
Yes, and a reroof is the best time for foil-faced sheathing: OSB or plywood with foil laminated on one side, installed like standard decking with the foil side facing down into the attic, never up toward the shingles, with small gaps between panels for expansion.
Will dust on the foil ruin its performance?
Dust greatly reduces effectiveness, because it raises emissivity and dulls reflectivity. A rafter mount, where the foil faces downward and dust falls away, tends to hold performance better than a floor mount, where the foil faces upward and collects whatever drifts down.
Is a radiant barrier worth it in a cooler climate?
Usually much less so than in a hot, sunny region. In cooler climates the radiant load is smaller, summers are shorter, and the barrier’s contribution may not justify its cost. Air sealing and bulk insulation, which pay back year-round, are generally the better first steps there.
Do I need a professional to install a radiant barrier?
Not always, but a professional is the safer choice for a full rafter installation in a hot, low-pitch attic, and for any roof with leaks or condensation, old or unclear wiring, or chimneys, flues, and recessed lights needing clearance.
Final Thoughts: Is a Radiant Barrier the Right Heat Shield for Your Roof Assembly?
A radiant barrier earns its place when three conditions line up: a genuine radiant load, a correct installation, and a house that already has its basics in order. The load comes from a hot, sun-exposed roof, most often dark-shingled, in a climate where air conditioning works hard through summer. The correct installation means a reflective face looking across an open air gap of one-half inch to one inch, a perforated product where moisture vapour must pass, and a position chosen for the roof’s timing and access. The basics mean air sealing, bulk insulation at its intended depth, and ventilation that can carry deflected heat outdoors. Where they are not met, the same material will disappoint, and the money is better spent on the missing basics.