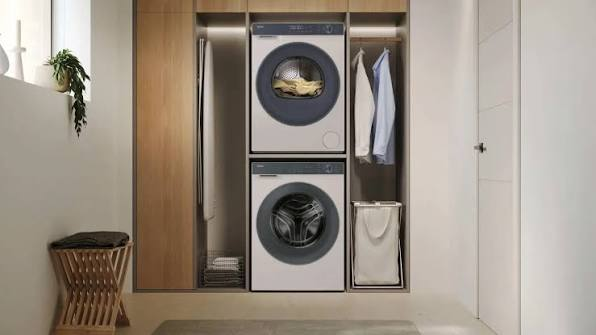
A washing machine should hum through the spin cycle, not bang, thump, and walk across the laundry room. Some vibration is normal — a drum spinning at 1,000 to 1,400 revolutions per minute will always transfer a little energy to the floor — but loud noise and a machine that ends up inches from where it started are signs something is off. Most cases have simple, inexpensive causes: an unlevel machine, a heavy load bunched on one side, or transit bolts that were never removed. This guide works through the fixes in order, from free adjustments you can do in 20 minutes to worn parts that need a technician.
Why Washing Machines Vibrate
During the spin cycle, the machine extracts water by spinning the load at high speed. If the weight is perfectly even, the forces cancel out. If it is not — and it rarely is — the heavier side pulls outward with every rotation and the cabinet rocks in response. Modern machines try to correct this by stopping, tumbling the load to redistribute it, and trying again, which is why an unbalanced washer may pause, refill briefly, or extend the cycle.
Several problems turn that force into excessive noise and movement:
- Unbalanced loads: A single duvet, bath mat, or pair of trainers absorbs water and slumps heavily to one side.
- An unlevel machine: If one corner sits lower, the cabinet rocks and amplifies every rotation.
- Transit bolts still fitted: New front-loaders ship with bolts locking the drum. If not removed, the suspension cannot move and the machine shakes violently.
- A weak floor: Timber floors flex under the machine, magnifying vibration that would be minor on concrete.
- Worn parts: Tired dampers, stretched springs, or failing bearings let the drum move too far.
Top-load machines vibrate for similar reasons, though they more often suffer from a load piled on one side of the agitator. Vibration from day one points to installation; vibration that has grown worse over months usually points to wear.
Leveling the Machine Correctly
Leveling is the single most effective fix, and it costs nothing. A machine that is level side to side and front to back, with all four feet firmly planted, has far less reason to rock, creep, or bang. You will need a spirit level and an adjustable wrench or pliers.
How to Level Step by Step
- Empty the drum, unplug the machine, and pull it out to reach the rear feet.
- Place the spirit level on top, first left to right, then front to back. Check both — fixing only one leaves a diagonal rock.
- Adjust the front feet: clockwise lowers a corner, anticlockwise raises it. Rear feet on many front-loaders are self-leveling; tilt the machine forward and set it down to let them settle.
- Tighten the lock nuts against the base once each foot is set, or the feet will unwind during spins.
- Rock the machine diagonally on opposite corners. There should be no movement; any wobble means one foot is not carrying weight.
When you push the machine back, avoid dragging it on adjusted feet, which can twist them out of setting. Slide it on cardboard if needed, then recheck the level in its final position. Run an empty rinse and spin cycle: a correctly leveled machine may tremble slightly at peak speed but should not thump or travel.
Anti-Vibration Pads and Mats
Once the machine is level, anti-vibration products can take the edge off what remains, especially on tile, laminate, or concrete. Rubber pads under each foot typically cost $12 to $25 for a set of four. Thicker mats covering the whole footprint cost $30 to $70 and also protect the floor from scratches and small leaks.
Choose dense rubber or rubber-and-cork pads rather than soft foam, which compresses unevenly and can worsen rocking. Cupped pads hold the foot in place and suit machines that walk. Re-level after fitting pads, as height and compression vary slightly.
Be realistic: pads dampen noise and minor tremor and stop creeping on smooth floors, but they cannot fix an unbalanced load, a broken damper, or a machine that was never leveled. If you still have to chase your washer after fitting good pads, the problem is mechanical or structural.
Loading Habits That Reduce Movement
How you load the machine matters as much as installation. Most spin problems in a healthy, level machine trace back to loads that are too small, too large, or badly mixed.
- Fill the drum about three-quarters full. Overfilling leaves no room to redistribute, while a very small load gives one wet item nothing to balance against.
- Mix sizes in every wash. Wash a heavy bath sheet with lighter items rather than alone, so weight spreads around the drum.
- Distribute items evenly in a top-loader, alternating pieces around the centre instead of dropping them on one side.
- Treat bulky singles with care. Duvets, blankets, and rubber-backed mats are classic troublemakers. Use the bedding cycle, add towels for balance, and pause to rearrange if the machine struggles.
- Empty pockets, zip up jackets, and put trainers in a wash bag. Loose hard objects add noise easily mistaken for a fault.
- Use a lower spin speed for heavy loads. Dropping from 1,400 to 800 or 1,000 rpm greatly reduces force while leaving clothes only slightly damper.
If the machine repeatedly stops to redistribute, do not just restart the spin. Open the door, untangle and spread the load by hand, remove an item if the drum is packed, then resume. Repeated failed spins stress the motor and suspension.
Floor and Pedestal Considerations
A perfect machine on a poor floor will still be loud. Ground-floor concrete slabs are ideal because they barely flex. Timber floors, especially upstairs or in older homes, act almost like a drum skin and can carry vibration into neighbouring rooms.
Moving the machine into a corner, where the floor is stiffer, or directly over a joist often reduces shaking. A 3/4-inch sheet of plywood extending about 6 inches beyond the machine on each side spreads the load across more joists and typically costs $25 to $45. Check the floor is sound — soft, water-damaged boards will flex and should be repaired first.
Pedestals need care. They raise front-loaders by 10 to 15 inches for easier loading, but that height raises the centre of gravity and can increase rocking if not level and fully secured. Use only the pedestal or stacking kit made for your model, tighten every bolt, and re-level afterwards. Never improvise height with loose blocks or bricks, and avoid carpet, which lets the feet sink unevenly.
Suspension and Mechanical Issues
When basic fixes do not solve the problem, look at the parts that absorb movement. Front-load machines hang the drum from springs at the top and support it with two to four friction dampers below. Top-loaders use suspension rods at the corners. When dampers wear or rods lose tension, the drum swings too far, hits the cabinet, and produces rhythmic banging.
Signs of Worn Suspension and Bearings
- Loud banging on spin even with a small, balanced load
- A drum that feels loose by hand, or does not spring back to centre
- A grinding roar that rises with spin speed, usually pointing to drum bearings
- Rusty marks below the machine or a leaking seal, often linked to bearing failure
- Broken springs, detached dampers, or cracked counterweights inside the cabinet
Handy homeowners sometimes replace top-loader suspension rods — about $30 to $60 a set — or front-loader dampers at $20 to $50 each, but both jobs involve opening the cabinet around sharp edges and electrical parts. Bearings are bigger: parts may cost $40 to $90, yet labour often brings the total to $250 to $450. Never run a machine with a suspected broken spring or counterweight; an unrestrained drum can tear hoses and wiring.
When to Call a Technician
Call a qualified technician when basic checks are done and the machine grinds, smells of burning, leaks, trips the breaker, or shows an imbalance or motor error code on every cycle. The same applies if the drum wobbles by hand, the machine still walks after careful leveling, or you suspect bearings, springs, or a cracked counterweight.
Expect a diagnostic fee of roughly $75 to $125, often credited toward the repair. Before the visit, note the model and serial number, when the vibration started, whether it happens on empty spins, and what you have tried. Ask for an itemised quote, and compare it with replacement: if a repair exceeds half the price of a comparable new machine and your washer is eight to ten years old, replacement is usually the better spend.
Final Thoughts
A noisy, wandering machine is rarely a mystery. Work in order: remove transit bolts on a new machine, level it until there is no diagonal rock, load it evenly and three-quarters full, and only then spend money on pads, plywood, or parts. Most households fix the problem in the first two steps, in under an hour, free. If shaking survives those checks, the machine is telling you its suspension or bearings are tired — get a diagnosis before a wobble becomes a torn hose or flooded floor.
Frequently Asked Questions
Why does my washing machine only shake on the spin cycle?
Spin is when forces peak. Washing turns the drum slowly, so an uneven load causes little movement. At 800 rpm and above, that weight pulls hard on one side with every rotation, which is why shaking and walking appear during spinning.
Can vibration damage my washing machine or floor?
Yes, if it continues. Persistent shaking loosens screws, hoses, and connections, wears the suspension faster, and can crack grout or mark flooring as the machine creeps. Fix the cause early rather than wedging the machine in place.
Do anti-vibration pads really work?
They work for minor tremor and noise on hard floors and stop a level machine creeping on tile or laminate. They will not cure strong shaking from poor leveling, unbalanced loads, or worn dampers. Fit them after leveling and re-level once in place.
Why does my new washing machine vibrate so badly?
The most likely cause is transit bolts still fitted. They lock the drum for transport and must be removed from the back of a new front-loader before first use, following the manual. Also check packaging blocks are gone and the machine is leveled.
Is it worth repairing a washer that vibrates because of bad bearings?
Sometimes. Bearings are inexpensive, but labour to strip the drum makes the total commonly $250 to $450. If the machine is under about seven years old and otherwise reliable, repair can make sense. On an older or budget model, put the money toward replacement.