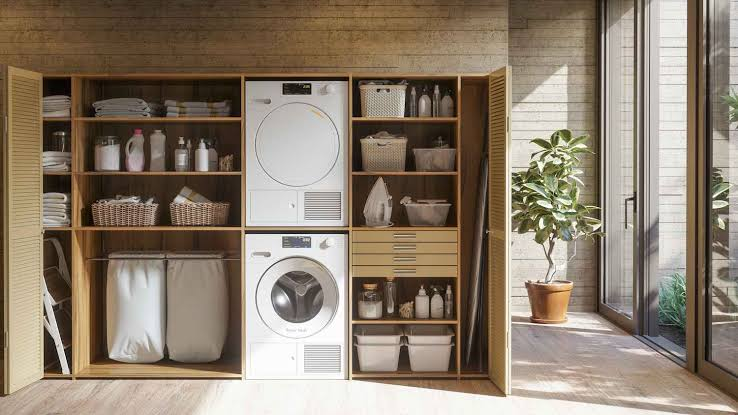
A washing machine is one of the few appliances that combines a pressurised water supply, a large volume of water, vibration, and a drain — all in one box. When something fails, it does not drip politely. A burst supply hose can release several gallons a minute, and on an upper floor that water quickly finds ceiling plaster, floor joists, and the room below. Good drainage planning will not stop every leak, but it decides whether a failure becomes a quick mop-up or a $5,000 to $15,000 insurance claim involving flooring, drywall, and mould treatment.
The approach that works is layered: contain the water, give it somewhere safe to go, shut the supply off automatically, and detect problems early. This guide walks through each layer in the order a homeowner should tackle it.
How Washing Machine Leaks Happen
Most laundry floods are not dramatic tub failures. They come from small, ageing parts that are easy to overlook until they let go, often while the machine is running unattended or overnight.
- Supply hoses: Plain rubber inlet hoses harden, bulge, and crack with age, especially near the crimped ends. They are under full household pressure 24 hours a day, even when the machine is off.
- Drain hose problems: A drain hose that slips out of the standpipe, splits, or clogs with lint can pump an entire load — 15 to 30 gallons on older top-loaders — straight onto the floor.
- Door seals and internal hoses: Front-loader door gaskets tear or trap coins and hair clips, and the short internal hoses to the pump and dispenser perish over time.
- Pump and valve failures: A cracked drain pump, a stuck inlet valve that overfills the tub, or a loose hose clamp inside the machine leaks slowly at first, which is why damage is often hidden under the machine for months.
Understanding these causes matters because each layer below targets a different one. A drain pan helps with slow leaks, but only an automatic shutoff stops a burst supply hose.
Drain Pans and Floor Drains
A drain pan is the shallow tray that sits under the machine. It catches drips and small leaks and, when plumbed correctly, carries them away before they reach the subfloor.
Choosing and Installing a Drain Pan
Basic plastic pans cost $25 to $45, while heavy-duty or stainless steel pans run $90 to $180 and suit second-floor installations better. Size the pan at least 2 inches wider than the machine on all sides, and lift the machine in with help — sliding it in cracks pan lips. The critical detail is the drain outlet: a pan without a drain connection only delays a flood. Connect the pan’s side or bottom outlet to a drain line with 3/4-inch or 1-inch PVC, and test it by pouring in a jug of water before the first wash.
Adding a Floor Drain
A dedicated floor drain is the gold standard, particularly for laundry rooms above living space. The floor should slope gently toward the drain — about 1/4 inch per foot — which is easiest to achieve during a renovation when tile or sheet vinyl is being replaced anyway. Retrofitting a floor drain typically costs $500 to $1,500 with a plumber, depending on access to the waste line below. Remember that floor drains need a trap primer or regular water top-ups; a dry trap lets sewer gas into the room, a problem many owners only notice in rarely used basement laundry areas.
Standpipe and Hose Setup
The standpipe is the vertical pipe the drain hose empties into, and incorrect setup here causes a surprising share of laundry overflows.
- Height matters: The standpipe should stand 30 to 42 inches above the floor, or at least 18 inches above the machine’s flood-level rim. Too short, and discharge water backs up and spills; too tall, and the pump strains.
- Secure the drain hose: Leave a small air gap and fasten the hose to the standpipe with a strap or zip tie so pump vibration cannot work it loose. Never seal the hose tightly into the pipe — that creates a siphon risk.
- Check the trap and vent: Every standpipe needs a P-trap below it and proper venting. Gurgling, slow drainage, or sewer smells usually mean a venting or partial blockage problem worth fixing before it becomes an overflow.
- Upgrade supply hoses: Replace rubber hoses with stainless steel braided, burst-resistant hoses for $25 to $40 a pair. Note the date on a label or with a marker so replacement is never guesswork.
Water Supply Valves and Auto-Shutoff Devices
Even the best drainage cannot keep up with a fully open supply line, so controlling the water at the source is essential.
Manual Valves You Can Actually Reach
Every laundry room should have individual hot and cold shutoff valves behind the machine, in a recessed washer box that keeps them accessible. If you must pull a vibrating machine away from the wall to reach yours, replace stiff old gate valves with single-lever ball valves, usually $150 to $350 fitted. Turn the water off when you go on holiday — it takes ten seconds and removes the highest-risk scenario entirely.
Automatic Shutoff Systems
Auto-shutoff devices close the supply when they sense trouble. Flood-stop style systems, around $180 to $350 plus fitting, use a sensor on the floor and motorised valves that close within seconds of contact with water. Whole-home smart shutoff valves, such as inline monitors costing $450 to $700 installed, watch flow patterns and close the main line if they detect an abnormal continuous flow. For a second-floor laundry, an appliance-level system is usually the best value because it reacts fastest and does not depend on Wi-Fi to work.
Waterproofing the Laundry Area
Waterproofing assumes water will escape at some point and protects the structure when it does. Start with the floor: sheet vinyl, porcelain tile with sealed grout, or a waterproof luxury vinyl plank rated for wet areas all outperform laminate and engineered wood, which swell quickly. Apply a liquid waterproofing membrane under tile, carried at least 4 inches up the wall, just as you would in a shower.
Protect the walls and edges too. Seal the gap between flooring and skirting with flexible sanitary silicone, fit a low threshold or water bar at the doorway to slow water reaching a hallway, and consider a waterproof backer panel behind the machine where pipes pass through. In upstairs rooms, a waterproof membrane under the whole floor area, turned up at the edges like a shallow tray, gives the drain pan a second line of defence.
Leak Detection Sensors and Alarms
Detection is the cheapest layer and often the one that saves the most money, because damage grows with every minute water runs unnoticed.
- Basic water alarms: Battery units costing $10 to $25 sit on the floor behind the machine and sound a loud alarm on contact with water. They only help if someone is home to hear them.
- Smart Wi-Fi sensors: At $35 to $60 each, these send a phone alert as well as sounding locally. Place one in the drain pan, one behind the machine, and one under any nearby sink or water heater.
- Placement tips: Put sensors at the lowest point water will reach, flat on the surface, not on top of the pan lip. Test them every few months with a damp fingertip and replace batteries yearly.
Pair detection with shutoff where you can. A sensor that only alerts you while you are on a flight is information; a sensor linked to a valve is protection.
Maintenance Routines That Prevent Damage
Most laundry water damage is preventable with short, regular checks. Put these on a calendar rather than relying on memory:
- Every month: Run a quick visual check behind the machine for damp patches, white corrosion on valve connections, and hoses that feel soft, bulging, or cracked.
- Every six months: Clean the drain pump filter on front-loaders, wipe mould from the door gasket, check the drain hose connection, and pour water into the floor drain to keep its trap full.
- Every three to five years: Replace supply hoses, even if they look fine — sooner for plain rubber. Replace a worn door gasket at the first sign of tearing rather than after it leaks.
- After every move or installation: Confirm the machine is level so it does not walk during spin cycles, which loosens hoses and can pull the drain hose out of the standpipe.
Keep a folded towel, a torch, and knowledge of your main water shutoff near the laundry room. In a real leak, the fastest win is always closing the supply first and investigating second.
Final Thoughts
No single product makes a laundry room flood-proof, but layers working together come close. A drained pan and a sound standpipe handle everyday leaks, waterproofing protects the structure, sensors warn you early, and an automatic shutoff stops the worst failures when nobody is around. Start with the inexpensive steps — braided hoses, a sensor, and a pan — then add the plumbing upgrades at your next renovation. The total cost is modest compared with repairing even one serious leak.
Frequently Asked Questions
Is a drain pan really necessary if my laundry room is in the basement?
It is less critical on a concrete basement floor with a nearby floor drain, but still worthwhile. A pan protects stored items, finished basement flooring, and the machine itself from sitting in water, and it makes small leaks visible before they spread under walls.
How often should washing machine hoses be replaced?
Replace plain rubber hoses every three years and stainless braided hoses every five years, or sooner if you see bulging, rust at the fittings, or cracking. Write the installation date on the hose so the decision is based on age, not appearance alone.
What is the best protection for a second-floor laundry room?
Use the full combination: a drained metal pan, a floor drain or membrane waterproofing, braided hoses, and an automatic shutoff valve with a sensor in the pan. Upper floors suffer the costliest damage because water travels down through ceilings and electrics.
Can I install an automatic shutoff valve myself?
Sensor-and-valve kits that connect to existing valves are within reach of a confident DIYer and take about an hour. Inline whole-home systems involve cutting pipework, so most homeowners should use a licensed plumber for those.
How much does a complete laundry drainage setup cost?
A basic layer — pan, braided hoses, and a sensor — costs roughly $80 to $200. Adding an appliance auto-shutoff brings the total to about $300 to $550, while a retrofitted floor drain can add $500 to $1,500 depending on access.