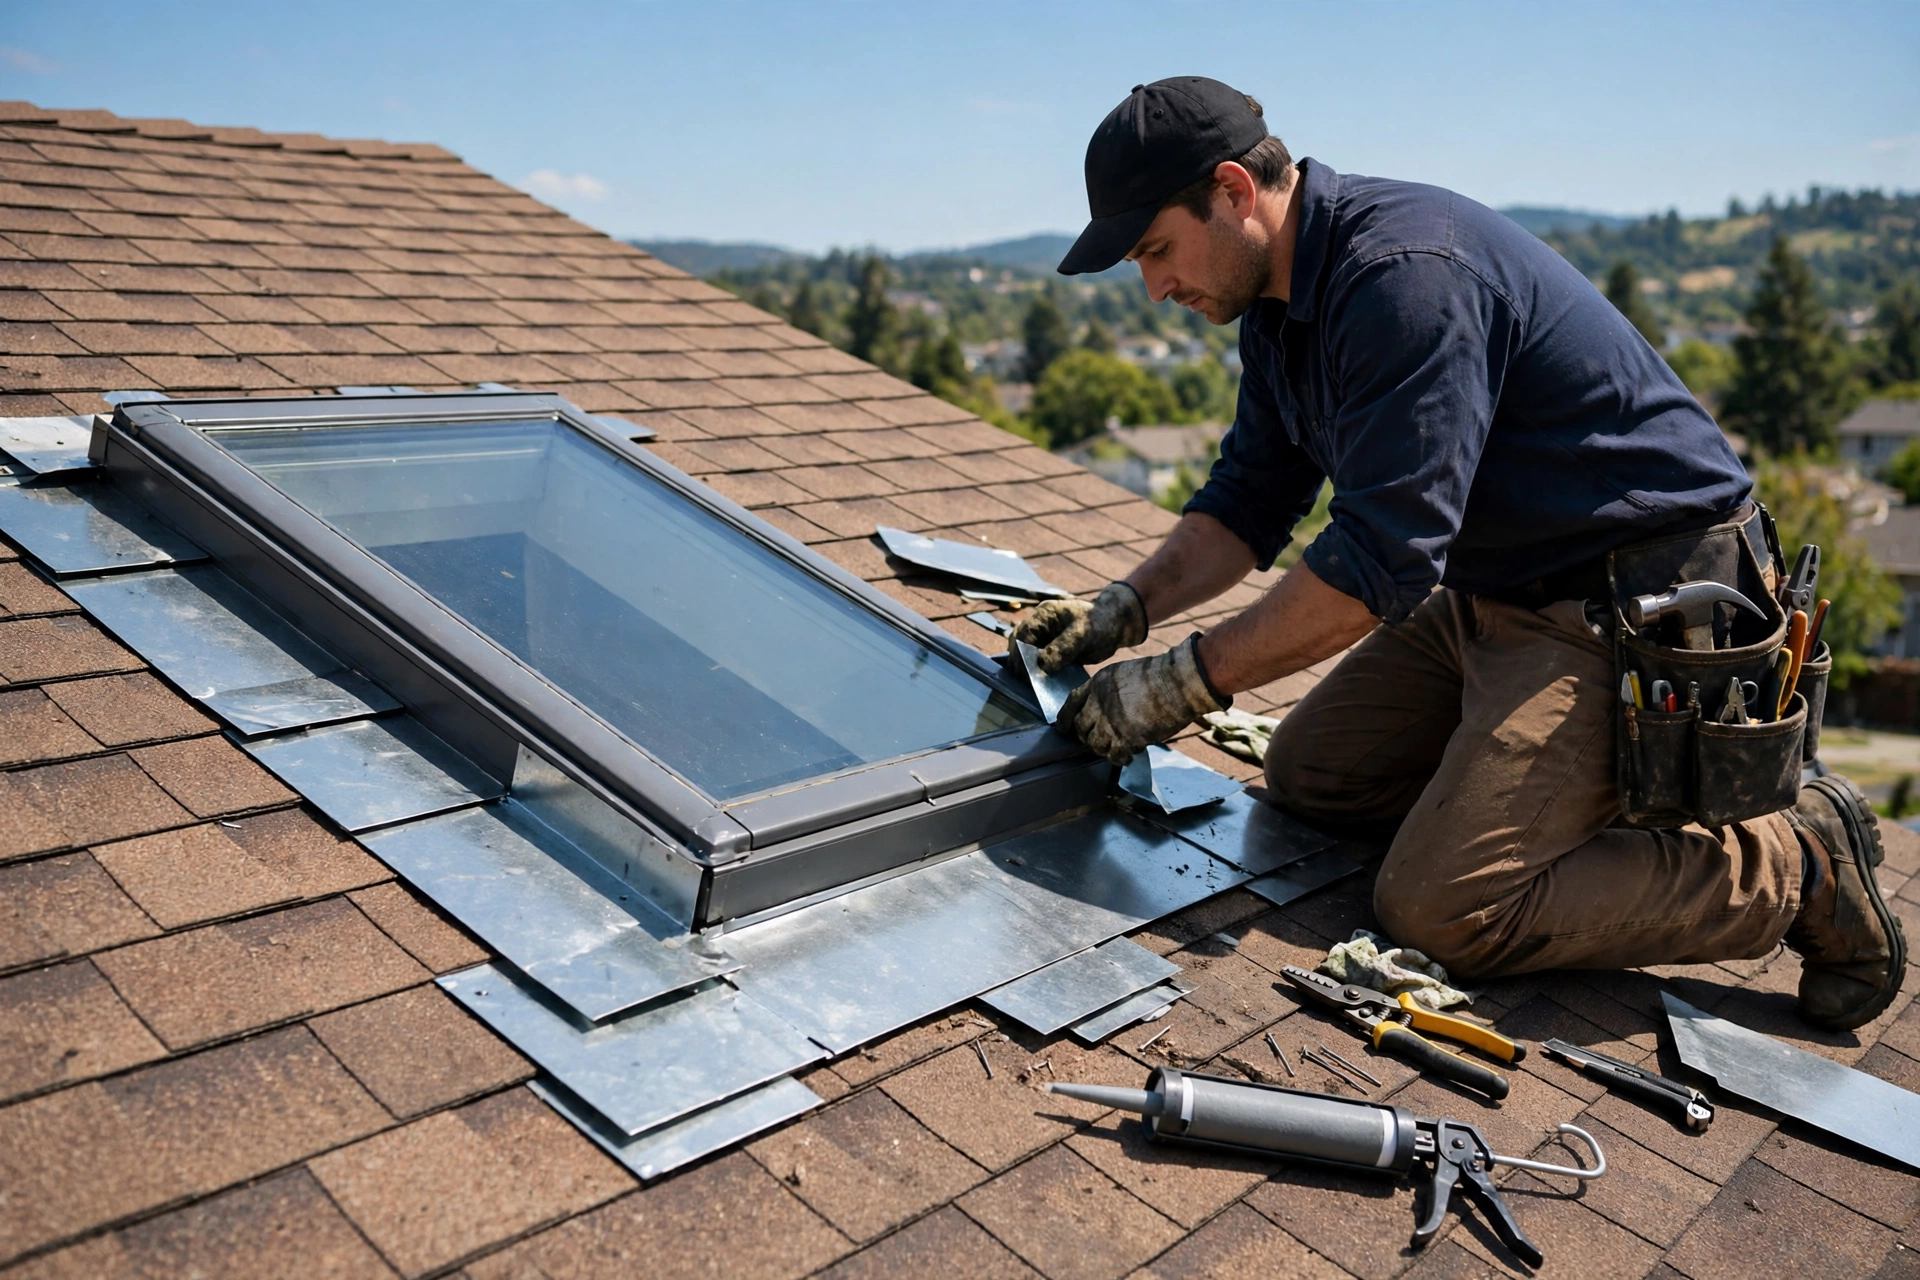
Water intrusion around a skylight is almost never a problem with the glass. It is a problem with the flashing, the layered system of metal and membrane that seals the joint between the skylight frame and the roof. When flashing is installed correctly, each piece overlaps the one below it so gravity carries rainwater down and away from the opening. When it is installed wrong, water finds the seam, works under the roofing, and shows up months later as a stained ceiling, damp insulation, or mold in the attic.
Preventing skylight leaks is therefore a matter of details: the right components, installed in the right order, with the right overlaps and fastener placement. Most modern skylights ship with factory flashing kits, but a kit only works when the curb is square, the underlayment is continuous, and every layer sheds water onto the layer below. This guide explains how that system works and how to get each part right.
Why Skylight Edges Leak Even When the Glass Is Fine
A skylight is a hole cut through the most weather-exposed surface of a house, and the joint where the rigid frame meets flexible roofing is the weakest point in the assembly. Rain runs down the roof slope, hits the top edge of the skylight, and must be split around the sides and shed over the shingles below. Wind-driven rain pushes water sideways and even uphill, ice dams can force it backward under shingles, and the frame itself expands and contracts with temperature, opening tiny gaps over time. Any one of these forces will exploit a flashing mistake.
The most common failures are easy to name once you know what to look for. Step flashing that is nailed through its lower edge creates holes below the waterline. Sealant used as the primary defense instead of metal eventually cracks and peels. A curb that sits too low lets snow and standing water reach the frame. Debris clogging the weep channels of a factory kit sends water sideways into the attic insulation. And flashing installed out of sequence, with an upper piece tucked under a lower one, directs water straight into the joint instead of away from it. Understanding these failure points is what makes prevention possible.
- Nailed below the waterline: fasteners through the exposed part of flashing become leak paths the first time it rains.
- Low curb height: a curb under four inches high lets snowmelt and ponding water reach the skylight frame.
What Does a Complete Skylight Flashing System Include?
A complete skylight flashing system has four layers working together, and leaving any one out weakens the whole assembly. The first is a self-adhering waterproof underlayment membrane, often called ice and water shield, wrapped around the rough opening and up the curb sides. It is the secondary defense that catches any water that gets past the metal. The second is the metal flashing itself: sill flashing at the bottom, step flashing along the sides, and head flashing at the top.
The third layer is the skylight’s own frame and factory weatherstripping, which sheds water off the glass and directs it onto the flashing below. The fourth is the roofing material itself, woven with the flashing so each shingle course overlaps the metal beneath it. The metal is usually aluminum, galvanized steel, or copper, and the choice matters: aluminum is light and corrosion resistant but can react with certain roofing materials, galvanized steel is strong and affordable but needs its coating intact, and copper lasts longest but costs the most and can stain adjacent materials.
Most major skylight manufacturers supply flashing kits matched to their units, with pre-bent pieces sized to the frame. Using the manufacturer’s kit is almost always the right call; custom-bent flashing is needed only for unusual roofs such as metal profiles or very low slopes.
Skylight Flashing Installation, Step by Step From the Sill Up
Flashing installation follows one unbreakable rule: work from the bottom up, so every piece overlaps the one below it and water always flows outward. The sequence matters more than the speed, and skipping ahead to the top before the sides are done is how leaks are built into a brand-new installation. Before any metal goes on, the rough opening should be framed square, the skylight set level on its curb, and the surrounding roof deck clean and dry.
Wrap the opening. Wrap the rough opening with self-adhering membrane, starting at the bottom and lapping each piece over the one below, extending onto the deck and up the curb sides.
Install sill flashing. Set the sill or apron flashing along the bottom edge, resting over the shingle course below, fastening only at the upper corners above the waterline.
Weave step flashing. Work up one side at a time, alternating one L-shaped step flashing piece with one shingle course, overlapping each piece by at least two and a half inches.
Mirror the other side. Repeat the step flashing sequence on the other side, keeping each piece nailed only at its upper corner so the metal can expand and contract.
Fit head flashing. Slide the head flashing over the top edge and under the shingle course above, so runoff from above is split onto the step flashing below.
Seal and check drainage. Seal the small joints with a compatible silicone or polyurethane sealant, and confirm the factory weep channels are open and clear of debris.
Two details in that sequence deserve emphasis. First, fasteners must stay above the waterline: a nail driven through the exposed lower portion of a flashing piece is a hole that water will find, while a nail at the upper corner is covered by the next piece up. Second, step flashing pieces must remain individual rather than one long continuous strip, because the roof and the frame move at different rates and a single long piece will buckle or tear. When these two rules are respected, the metal system does its job for decades with sealant playing only a supporting role.
Skylight Curb Height, Slope, and Other Details Installers Get Wrong
The curb is the raised wooden frame the skylight sits on, and its height is one of the most overlooked details in skylight work. A curb should stand roughly four to six inches above the roof surface, which gives the flashing enough vertical run to overlap properly and keeps snowmelt and wind-driven rain below the frame. On low-slope roofs, a taller curb is often needed, and some manufacturers specify a minimum curb height for warranty coverage. A curb that is too low cannot be fixed with extra sealant, and the only real remedy is rebuilding it higher.
Roof slope matters too. Most skylights are designed for slopes above a minimum pitch, commonly around 14 degrees, and installing one on a flatter roof without a curb-mounted design invites ponding against the frame. The skylight must sit square on the curb, because a racked frame stresses the factory seals and opens gaps flashing cannot cover. Finally, a valley or dormer dumping extra water onto the skylight will overwhelm even good flashing, so diverting that flow is part of the installation.
- Curb height: aim for four to six inches above the roof plane, taller on low-slope roofs.
- Minimum slope: respect the manufacturer’s pitch limit, or choose a curb-mounted unit designed for flat roofs.
Diagnosing a Skylight Leak: Flashing Failure or Condensation?
Not every drip under a skylight is a flashing failure, and misdiagnosing the cause wastes money. Condensation is the usual impostor: warm, moist indoor air rises to the cold glass, condenses, and drips onto the sill, looking exactly like a leak. The tell is timing. Condensation appears on cold mornings, in winter, or after showers and cooking, and it forms on the glass itself. A flashing leak appears during or after rain, regardless of indoor humidity, and the water usually shows up at the ceiling edges around the skylight shaft rather than on the glass.
To confirm, inspect the attic on a rainy day with a flashlight. Staining above the skylight points to head flashing, staining along the sides points to step flashing, and water at the bottom edge points to sill flashing or a blocked weep channel. If the roof is dry and the glass is wet, check indoor humidity: levels consistently above 50 percent in winter will condense on any cold skylight, and the fix is ventilation and humidity control, not new flashing.
Skylight Flashing Repairs You Can Make and When a Roofer Should Take Over
Some skylight flashing repairs are reasonable for a careful homeowner, and others belong to a roofer. Replacing dried sealant, clearing clogged weep channels, and re-securing a loose apron flashing are within reach for someone comfortable working on a roof, provided the roof is dry, the slope is manageable, and proper fall protection is used. Anything that requires lifting multiple shingle courses, re-weaving step flashing, or rebuilding a curb is a roofer’s job, because disturbing the shingle field without knowing the sequence can create more leaks than it fixes.
For a sealant repair, remove the old material completely, clean the joint, and apply a compatible silicone or polyurethane product in dry weather, tooling it smooth so water sheds off. For a flashing repair, never simply smear sealant over a failed metal joint; the metal must be replaced or re-lapped correctly. If the skylight is over fifteen years old, the frame seals themselves may be failing and the unit may need replacement rather than a flashing repair.
- Homeowner-safe: clearing weep channels, replacing dried sealant, tightening a loose apron flashing.
- Call a roofer: re-weaving step flashing, lifting shingle courses, rebuilding a low curb.
Skylight Flashing Questions Homeowners Ask Before Installing
How long does skylight flashing last before it needs replacement?
Properly installed metal flashing typically lasts as long as the roofing around it, often 20 to 30 years, though sealant joints need renewal every 5 to 10 years. Galvanized steel may corrode sooner in coastal or industrial air, while copper can last the life of the roof.
Can I reuse the old flashing when replacing a skylight?
It is rarely a good idea. Old flashing is usually bent, nailed through, and sized to the old unit, and reusing it saves little while risking the most leak-prone joint on the roof. A new flashing kit matched to the new unit is inexpensive compared with repairing a leak later.
Why does my skylight leak only in heavy rain?
Heavy rain, especially wind-driven rain, overwhelms marginal flashing: short overlaps, reversed laps, or a low curb that is fine in light rain but fails when water is pushed sideways or uphill. The leak appearing only in storms is a strong clue that flashing details, not the glass, are at fault.
Is condensation on my skylight a flashing problem?
Usually not. Condensation forms when warm, moist indoor air meets cold glass, and it is fixed by lowering indoor humidity and improving ventilation, not by replacing flashing. If water appears during rain rather than on cold mornings, flashing is the more likely cause.
How much does professional skylight flashing repair cost?
Costs vary widely with access and extent, but a straightforward flashing repair commonly runs in the low hundreds of dollars, while a full re-flash that requires lifting shingles can reach into the low thousands. Replacing a skylight and its flashing together is often the better value when the unit itself is old.
Final Thoughts: Dry Skylights Start With Layered Flashing
A skylight that never leaks is not luck; it is the result of layers installed in the right order, with overlaps that respect gravity and fasteners kept above the waterline. The glass gets the attention, but the flashing does the work. Judge any skylight job by its layers: membrane beneath, metal woven with the shingles, curb high enough to stay dry, and weep channels kept clear. Get those right and the skylight becomes what it should be, a source of light rather than a source of worry.