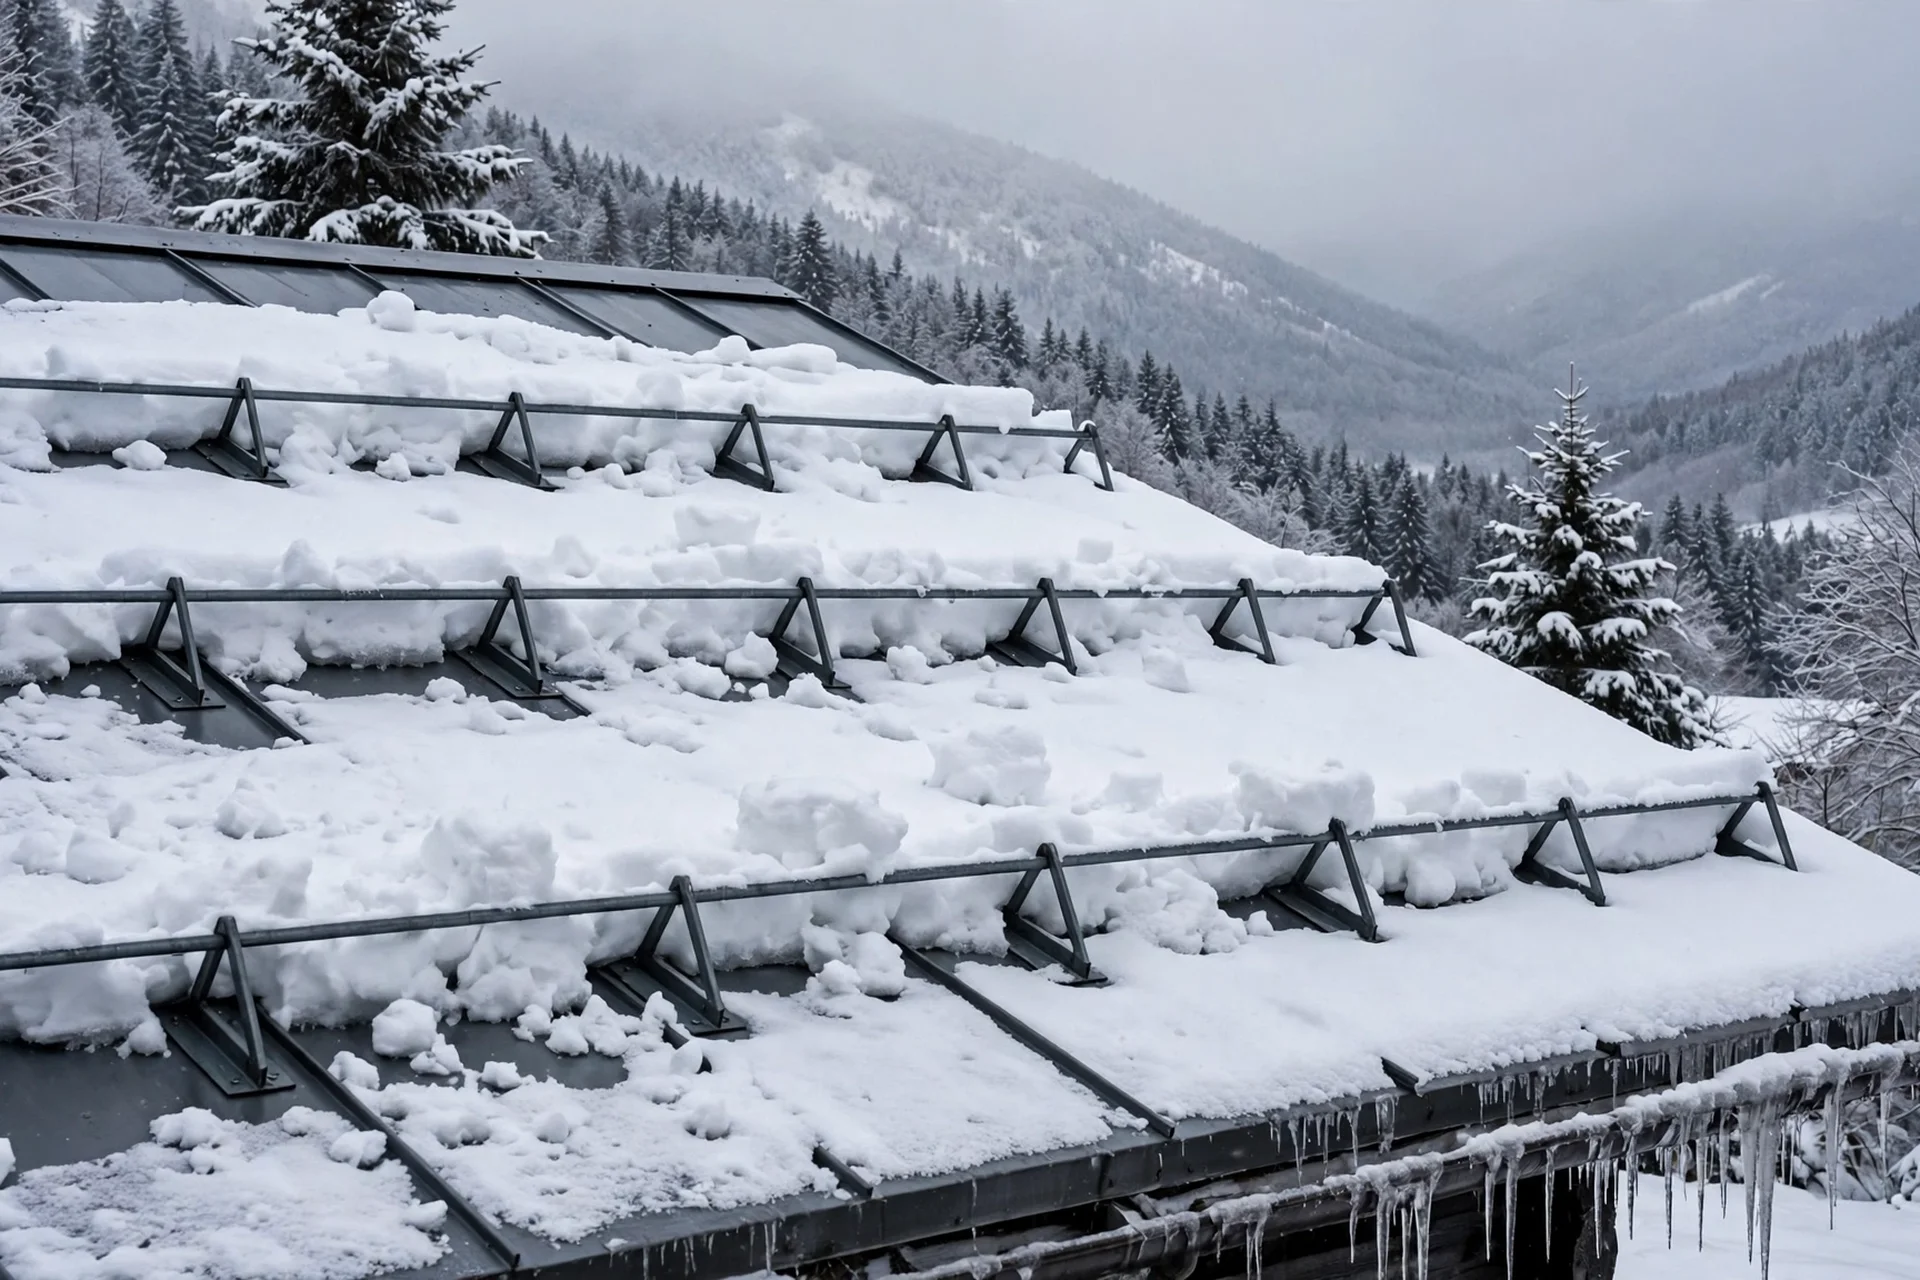
A metal roof sheds snow fast, and that is exactly the problem. After a heavy snowfall, a smooth metal surface can release the whole blanket at once, sending a dense slab sliding off the eave onto a walkway, a parked car, a deck, or the gutters themselves. Roof snow guards solve this by holding the snow on the slope so it melts or drops off in small, harmless amounts instead of arriving as a single avalanche. Installed in the right pattern and fastened to the structure below, they turn a sudden slide into a slow, controlled release.
Why Metal Roofs Shed Snow in Dangerous Sheets
Metal roofing is popular partly because snow does not cling to it. The smooth, low-friction surface, combined with heat escaping from the house below, lets a snow blanket loosen and move. On a shingle roof the rough surface and overlapping courses slow that movement. On metal, once the bond between snow and panel breaks, gravity takes over and the entire sheet can travel the full slope in seconds. The lower the pitch, the longer the snow sits; the steeper the pitch, the faster it releases once it starts moving.
The danger is not the snow itself but the way it arrives. A slab that has been sitting for days compacts into a heavy, icy mass.
- Entrances, garage doors, and walkways sit directly under the slide path on most homes.
- Gutters take the first impact, and a single heavy slide can bend or rip off a full run.
- Snow that slides onto a lower roof or a porch roof adds a sudden load where it was never planned.
- Vehicles, air-conditioning units, and gas meters parked against the house are all in the drop zone.
How Snow Guards Keep a Roof Load From Becoming a Falling Slab
A snow guard does not remove snow from the roof. It holds the blanket in place so it melts gradually or sheds in small pieces that cannot build up the momentum of a full-slope slide. The guard creates friction and a physical stop at one or more lines across the slope, and the snow bridges between the individual units or presses against the continuous bar. Over hours or days, sun and attic heat melt the layer from below while the guard keeps the mass from moving as one piece.
Pad-Style vs Bar-Style Snow Guards: Which System Fits Your Roof
Snow guards fall into two broad families. Continuous systems run a bar or tube across the whole width of a slope, supported by brackets. Unitized systems, often called pad-style guards or snow cleats, are individual units spaced across the slope that rely on the snow bridging between them. Both work when they are matched to the roof type, the pitch, and the expected snow load, and both fail when they are chosen on appearance alone.
| Feature | Pad-Style (Unitized) Guards | Bar-Style (Continuous) Guards |
|---|---|---|
| Form | Individual pads or cleats spaced in rows | One bar or tube running the full slope width |
| Best roof load | Ground snow loads up to about 45 psf | Heavier loads above about 45 psf |
| Attachment | Screw-down or adhesive on exposed-fastener roofs | Clamp-on brackets on standing seams, or screwed brackets |
| Appearance | Low profile, easy to blend with the roof | Visible horizontal line across the slope |
| Failure mode | Snow slips between pads if spacing is too wide | Bracket overload if rows are too far apart |
Clamp-On vs Screw-Down Attachment on Standing Seam and Exposed-Fastener Roofs
How a guard attaches matters as much as the guard itself, because every attachment is either a penetration through the weathering surface or a grip on a seam. On standing-seam roofs, clamp-on systems grip the raised seam with set screws and never pierce the panel.
On exposed-fastener roofs, screw-down guards are fastened through the panel into the purlins or the deck below, using self-tapping screws with neoprene washers and a bead of compatible sealant under the base. The screw must land in solid structure, not just the sheet, or the guard will pull out under the first heavy load. Adhesive-mounted pads exist for situations where drilling is undesirable, but they need a clean, dry surface, the adhesive the manufacturer specifies, and a full curing period, sometimes up to 24 hours, before they carry any load.
Planning Snow Guard Placement and Spacing Before Anyone Climbs the Roof
Good placement starts on the ground with a tape measure, a chalk line, and the manufacturer's spacing chart. Guards are usually placed in a line 12 to 18 inches up from the eave, though the range can run from 6 inches to 24 inches depending on the roof and the product.
Measure each slope and mark the areas that must be protected first: entrances, driveways, patios, and any place people walk or equipment sits below the eave.
Check the local ground snow load and the roof pitch, then read the manufacturer's spacing table for the guard model you have chosen.
Snap a chalk line for the first row, usually 12 to 18 inches above the eave, and mark every guard position along it.
Plan additional rows on slopes longer than about 25 feet, staggering each row so no vertical gap lines up with the row below.
Confirm where the screws will land: purlins on exposed-fastener roofs are commonly spaced 2 to 5 feet apart, and every screw-down guard should hit one.
What Snow Load and Roof Pitch Mean for Guard Density
Two numbers drive every spacing decision: how much snow the roof must hold, and how steeply the slope encourages it to move. Ground snow load is published on local snow load maps and in the building code, and it varies widely even within one state.
- Ground snow loads up to about 45 psf usually suit staggered pad-style guards with 9 to 12 inches of horizontal spacing and 1 to 5 feet between rows.
- Loads above about 45 psf call for a bar system, because a continuous rail spreads the force across brackets instead of single points.
- Steeper pitches need closer rows, since the snow starts moving sooner and with more energy.
- Long slopes need two or more rows so the upper snow is held before it can press on the row above the eave.
- Metal type matters too: the guard material must be compatible with the roof metal, or galvanic corrosion will attack the contact point.
Installing Screw-Down Pad Guards on an Exposed-Fastener Roof
Screw-down pad installation is straightforward work, but it is roof work, and it belongs to a dry, calm day with proper fall protection. Work from a secured ladder or a roof harness, never from a wet or icy slope, and plan the job for late summer or early autumn so the roof is fully accessible and the sealant cures in warm weather.
Snap chalk lines for each row, then mark every guard position so the pattern stays straight and evenly spaced.
Set each pad on its mark and check that the screw holes sit over a purlin or solid decking, not over open air between supports.
Apply a bead of manufacturer-approved sealant or silicone caulk under the pad base before setting it down.
Drive the self-tapping screws with neoprene washers through the pad into the structure below, tightening firmly without deforming the panel or crushing the washer.
Work row by row from the eave upward, keeping the staggered pattern so each upper pad sits between two pads in the row below.
Walk the finished rows and check every washer for a full seal, then note the guard positions for the first winter inspection.
The most common error is over-tightening. A crushed washer loses its seal, and a deformed panel creates a low spot where water collects. Snug is enough: the washer should compress evenly around the screw without bulging out from under the pad. If a screw spins without biting, the purlin was missed, and the pad must move to solid structure rather than being left on a screw that holds nothing.
Installing Clamp-On Bar Guards Without Drilling the Seams
A clamp-on bar system avoids penetrations entirely, which is its main advantage on a standing-seam roof. The brackets clamp onto the raised seams at the spacing the manufacturer specifies, and the bar or tube locks into the brackets to form the continuous retaining line. Because nothing pierces the panel, the roof's weathering surface stays intact and the panels remain free to expand and contract with temperature.
Fit matters more than force. Each clamp must match the seam profile of the roof, whether that is a snap-lock, mechanical-lock, or T-seam, and the set screws must be torqued to the stated value. Too loose and the bracket slides down the seam under the first snow load; too tight and the seam deforms, which can open a path for water.
Snow Guard Upkeep After the First Winter and the Mistakes That Undo the System
Snow guards need little maintenance, but they do need one inspection a year, ideally in spring after the last snow. Walk the ground and look for pads that have shifted, bars that have bowed, washers that have cracked, and sealant that has pulled away from a base.
- Installing guards only above the front door while the driveway and patio slopes stay unguarded.
- Spacing pads by eye instead of following the manufacturer's chart for the local snow load.
- Screwing guards into floating standing-seam panels, which locks the panel and invites leaks.
- Using a guard metal that corrodes against the roof metal, especially bare steel on aluminum or copper.
- Skipping the sealant under screw-down bases, so every fastener becomes a slow leak point.
- Assuming the guards remove snow: the retained blanket still loads the roof and still needs watching in extreme winters.
Final Thoughts: A Metal Roof That Holds Its Snow Instead of Dropping It
A metal roof is an excellent roof in snow country, provided the snow leaves it on your terms. Guards cost a fraction of a gutter replacement or a hospital visit, and a professional installation commonly runs in the broad range of roughly $1,000 to $4,000 depending on roof size, guard type, and access.
Snow Guard Questions Homeowners Ask Before the First Snowfall
Do metal roofs need snow guards by code?
Most building codes do not require snow guards on residential metal roofs, but that does not make them optional in practice. The owner remains responsible for snow and ice falling from the building onto people and property below.
Will snow guards damage my metal roof?
Properly installed guards do not damage the roof. Clamp-on systems never pierce the panel, and screw-down systems seal each penetration with a neoprene washer and sealant. Damage comes from the wrong attachment: screws driven into floating standing-seam panels, over-tightened fasteners that deform the sheet, or incompatible metals that corrode at the contact point.
How far from the eave should snow guards sit?
The usual placement is 12 to 18 inches above the eave, with an accepted range of about 6 to 24 inches depending on the product and the roof. The first row should sit above the exterior wall line so snow is stopped before it reaches the overhang.
Can I install snow guards myself?
A handy homeowner can install pad-style guards on a low, easily reached exposed-fastener roof, but the work still involves roof access, fall risk, and precise spacing. Steep slopes, standing-seam roofs, and bar systems are better left to a roofing professional who can calculate snow loads, match clamps to the seam profile, and warranty the work.
Do snow guards work on shingle roofs too?
They can, and pad-style guards are made for shingles as well, but the need is smaller because shingles grip snow far better than smooth metal. On a shingle roof the bigger concern is usually ice dams at the eave, which guards do not solve.
What happens to the snow the guards hold back?
It stays on the roof and melts gradually, or it sheds in small amounts that cannot build dangerous momentum. The roof structure carries that retained load, which is why guards are sized to the local snow load rather than installed at random. In an extreme winter with exceptional accumulation, the roof may still need snow removed by a professional.