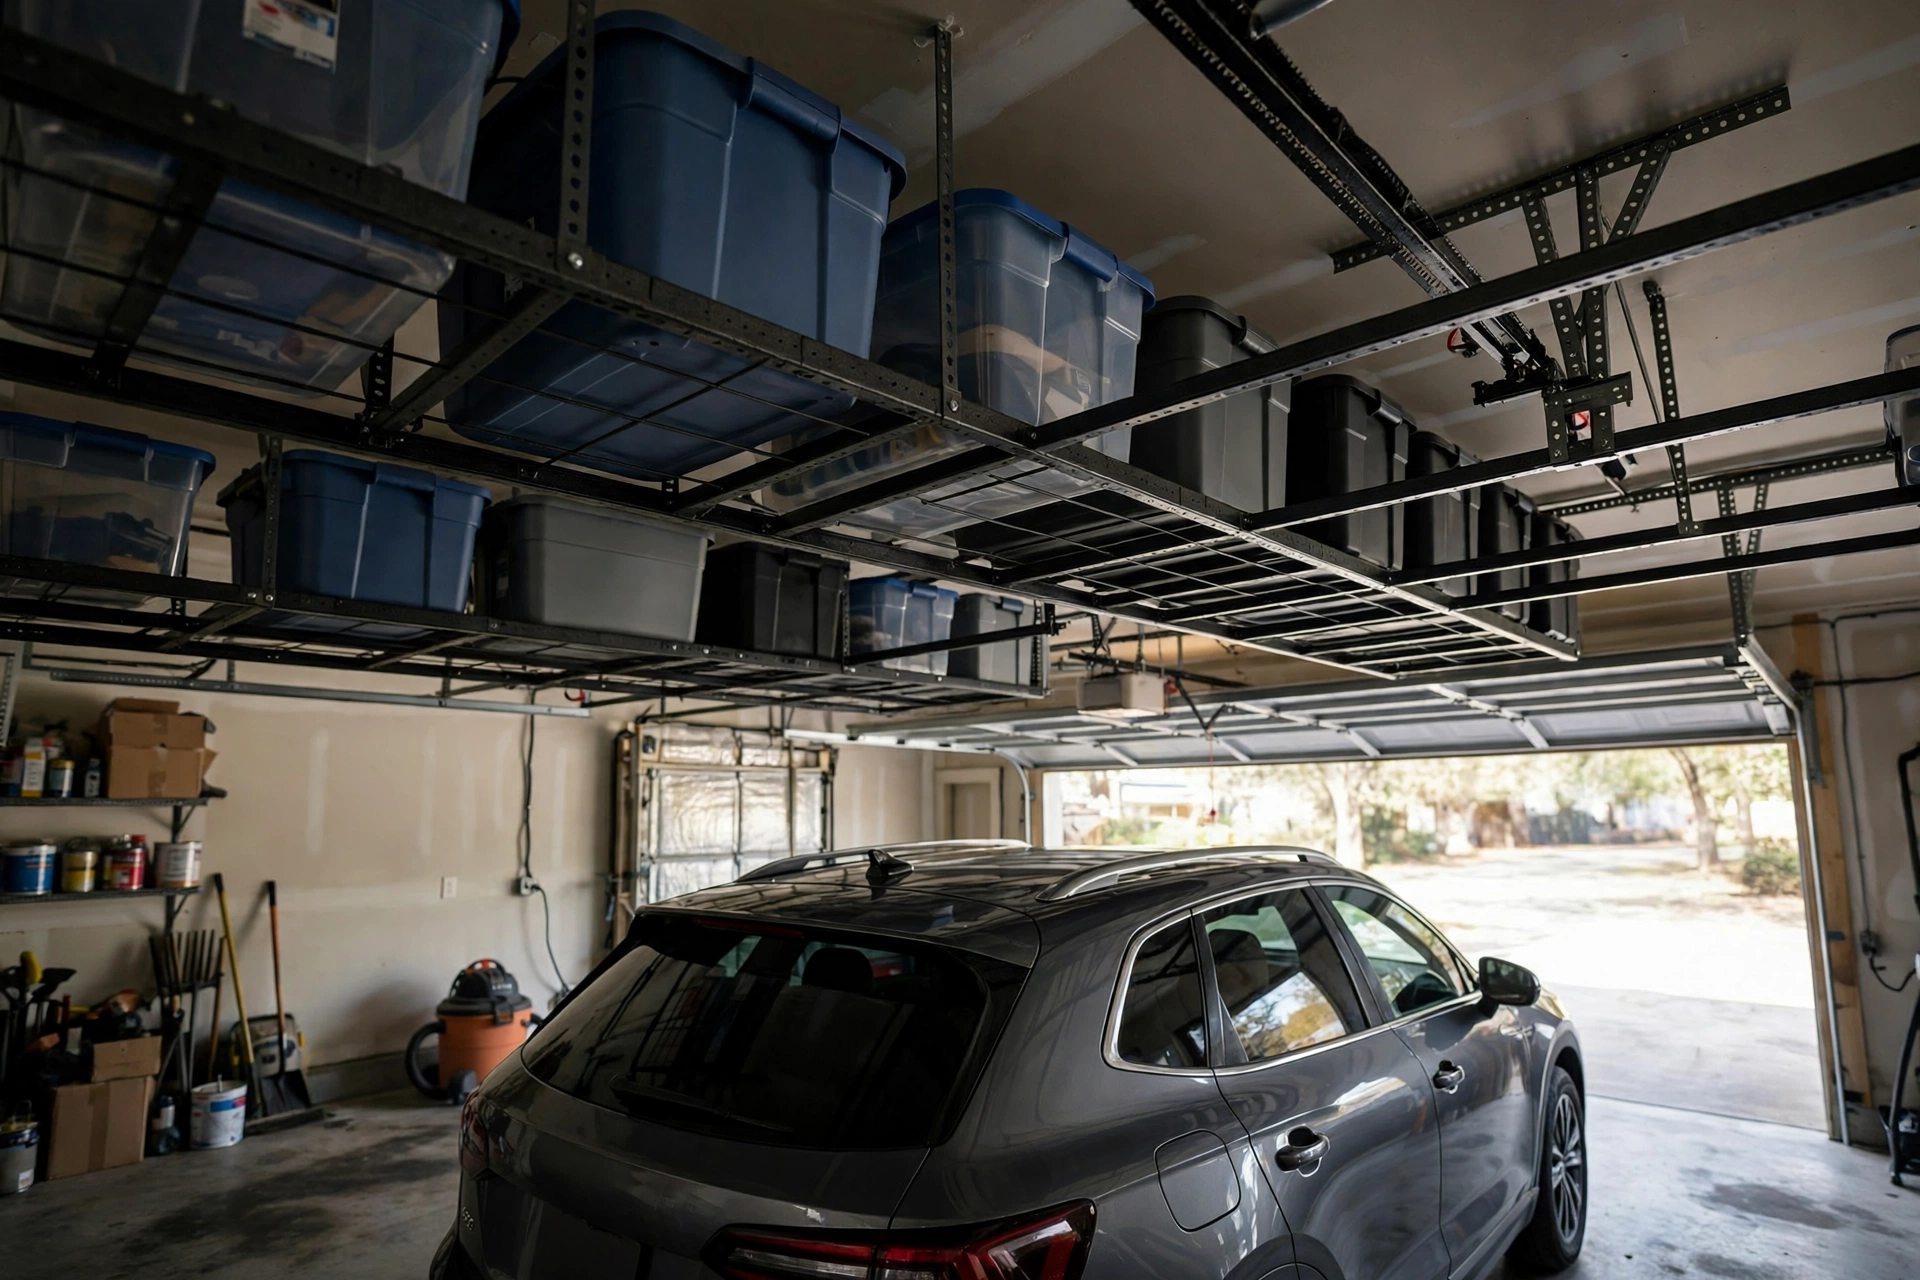
If your car lives in the driveway because the garage floor is buried under bins and camping gear, the problem is rarely a lack of space. It is a lack of height. Most garages hold a large empty zone above head level, and a garage ceiling storage rack turns that dead air into usable storage. The payoff is measured on the floor: a bay you can actually drive into and doors that open fully.
- The short answer: Garage ceiling storage racks free up floor space by moving bulky, rarely used items — seasonal bins, camping gear, spare tires, luggage — onto steel platforms bolted to the ceiling joists, usually above the parked car or along the perimeter. A standard 4-by-8-foot rack clears roughly 32 square feet, often the difference between parking inside and on the street. The trick is placing it so it clears your vehicle and the garage door, and loading it only with items you do not need weekly.
Reading Your Garage Floor Like a Parking Problem, Not a Storage Problem
Before buying a rack, look at the floor the way a driver does. Open both car doors fully, swing the tailgate up, and walk from the house door to the car without turning sideways. Every place a bin or toolbox forces a detour is floor space a ceiling rack can win back.
Most cluttered garages fail in the same three places: the parking bay, where bins creep in until the car no longer fits; the walkway to the house door, which becomes a single-file squeeze; and the area in front of the garage door, where seasonal gear blocks its travel. A ceiling rack addresses all three because it removes storage from the floor entirely. Sketch the floor first, marking the car's outline, door swings, and opener rail — that sketch becomes your shopping list.
Parking-Bay Placement: Where a Rack Belongs Over a Car, and Where It Never Should
The most valuable rack position is directly above a parking bay, and it demands the most care. It works when the ceiling is high enough that the loaded rack clears the vehicle's roof, roof box, or open tailgate. It fails when the rack hangs so low that loading means climbing over the car.
Start with the tallest vehicle that will park beneath the rack, including anything on its roof. Measure floor to ceiling joists in the same bay; the gap between those numbers is your working envelope, and the rack platform, its drop, and the bins on top must all fit inside it with room to spare. Many adjustable racks drop 20 to 40 inches, so a 10-foot ceiling over a sedan has plenty of room, while an 8-foot ceiling over a tall SUV may only suit a shallow rack.
Keep racks clear of the garage door's moving parts. The opener rail runs down the center of the ceiling, and the door panels stack along the ceiling when open. Most homeowners end up with racks to either side of the opener rail, toward the back wall, or over the rear half of the bay.
- Over the rear half of a parking bay: usually the safest over-car position.
- Over the back wall zone behind the car: ideal for seasonal bins.
- Never across the opener rail or door track path: this blocks the door.
Measuring Clearance Over Your Vehicle: The 12-Inch Rule and the Tailgate Test
A widely used rule of thumb is to keep at least 12 inches between the bottom of the loaded rack and the top of the vehicle beneath it, and more is always better. Some installers recommend 18 inches above a tall SUV, because roof boxes and open hatches add height a roofline measurement alone will miss. Treat 12 inches as a minimum, not a target.
The tailgate test catches what the tape measure misses. Mark the rack position in painter's tape, open the tailgate fully, and walk around the car with the doors open. If anything comes close to the marked zone, shift the rack toward the back wall or raise its drop height. Repeat with a roof box fitted if you ever drive with one, and use the lowest ceiling measurement in the zone.
What Deserves the Overhead Spot: The Seasonal and Bulky Shortlist
A ceiling rack earns its keep with items that are bulky, light for their size, and needed only a few times a year: holiday decorations, camping gear, sleeping bags, luggage, spare tires, and coolers. These are exactly the items that colonize garage floors — too big for a shelf and too awkward to stack neatly.
Some things should never go overhead. Heavy, dense materials such as tile or full paint cans concentrate too much weight in one spot and are miserable to lower down a ladder. Liquids, aerosols, batteries, and electronics suffer in garage heat and cold, and a leaking container above a car is a disaster. Frequently used tools belong at eye level, because a rack that needs a ladder for weekly items will stop being used. Use uniform lidded totes, label the visible side, and keep heavy bins near the support points.
Fixed Platforms, Drop-Down Racks, and Motorized Lifts: Picking by How Often You Park Beneath Them
The right rack type depends less on budget than on how often you need what is stored on it. A fixed platform is the simplest and cheapest option: a steel frame and wire deck bolted to the joists, accessed by ladder. It suits seasonal items touched twice a year, and it is the best value over a daily parking bay, because nothing moves while you load it.
Drop-down and sliding-bin racks suit items used more often, removing the ladder from the routine. Motorized lifts go further, lowering the whole platform to the floor at the push of a button — a genuine advantage for heavy items and for anyone who cannot safely climb a ladder. The trade-off is cost, lower weight ratings than many fixed racks, and a need for power and clearance above the raised platform. Pulley hoists solve the single-item problem — a kayak or bicycle flat against the ceiling.
A Weekend Sequence for Getting Bins Off the Floor Without Blocking the Driveway
Moving a garage full of floor clutter overhead in one weekend is realistic if the sequence is right. Sort first, measure second, install third.
Empty one parking bay and sort its contents into keep-overhead, keep-at-ground-level, and donate piles.
Measure the bay's ceiling height, the tallest vehicle, and the door track and opener rail, and mark the rack outline in painter's tape.
Locate the ceiling joists with a stud finder and mark every bolt point before drilling.
Assemble the rack on the floor, lift it into place with a helper, and anchor every bracket into solid joists — never drywall.
Load the lightest bins first, distribute weight evenly, label each bin visibly, and rerun the tailgate test with the car parked beneath.
Two people make this job far easier and safer, since a 4-by-8-foot frame is awkward to hold overhead. Budget two to four hours for a first rack.
Floor Space You Win Back: Turning an Empty Bay Into a Workbench, Gym Corner, or Second Car Spot
The real return on a ceiling rack is not tidiness; it is the floor you get to use for something else. In a two-car garage, clearing one bay's worth of bins can mean parking both cars inside through winter instead of leaving one outside. In a single-car garage, the same space becomes a workbench wall, a gym corner, or a safe walkway around the car.
Plan the freed floor deliberately, or clutter will creep back within a season. Decide before the racks go up what each bay is for — parking, workshop, gym, or equipment such as a mower and snow blower — and mark it with a mat or the workbench itself, so future bins have an obvious home that is not the middle of a bay. A mower parked on a defined patch of floor, with fuel and accessories on a wall shelf, stays accessible without colonizing the bay.
Rack-Over-Vehicle Slip-Ups That Cost Drivers a Scratched Roof or a Blocked Door
Most ceiling-rack regrets trace back to planning shortcuts, not product defects. The classic error is measuring the car's roofline but forgetting the holiday roof box, or the tailgate that swings higher than the roof itself. Another is anchoring into drywall without finding the joists, which can end with a loaded rack sagging or falling onto the vehicle below.
Overloading is the quietest hazard. A rack's rating assumes weight spread evenly, and bins migrate as items are added and removed. A corner that slowly accumulates the heaviest bins will sag and strain its fasteners. Checking the rack twice a year — fasteners, sag, rust, load balance — takes ten minutes and prevents the failure that damages a car. Treat the rack as a seasonal rotation, not archive storage: swapping winter and summer gear each season keeps every item justifying its place.
What a Ceiling Rack Setup Costs, From a Single 4×4 Platform to a Motorized Lift
Treat every figure here as a broad estimate, not a quote. A single fixed 4-by-4-foot steel rack typically runs in the low hundreds of dollars, while a 4-by-8-foot heavy-duty platform costs somewhat more and covers twice the floor area. Professional installation adds a few hundred dollars per rack but is worth it for finished ceilings or unusual joists.
Motorized lifts are the premium tier, generally costing well over a thousand dollars per platform before installation. They make sense when the alternative is a larger garage, a storage unit rental, or an injury risk from ladder use — not for light seasonal bins touched twice a year. For most households, two fixed platforms over the parking bays deliver more freed floor per dollar than one lift. Factor in bins, labels, and a sturdy step ladder rated for your weight plus the bin.
Garage Ceiling Rack Floor-Space Questions Drivers Ask Before Buying
Can I still park my car under a ceiling rack?
Yes, provided the math works: ceiling height minus vehicle height minus rack drop minus bin height must leave at least 12 inches, and the rack must sit clear of the door tracks and opener rail. Measure your tallest vehicle including roof boxes, and run the tailgate test first.
How much floor space does one overhead rack actually free?
A 4-by-8-foot rack clears about 32 square feet of floor — roughly the footprint of the bins and gear that would otherwise sit in a parking bay. Two racks can free enough floor to park a second car or set up a workbench.
Will a rack work in a garage with an 8-foot ceiling?
Sometimes, but the margin is tight. With an 8-foot ceiling and a standard sedan, a shallow rack with low-profile bins can work. With a tall SUV or truck, there may not be enough clearance for safe loading, and a wall-mounted rack may be better.
What should I never store on a rack above my car?
Heavy dense materials, liquids, aerosols, batteries, and heat-sensitive electronics. A leaking container or falling heavy bin above a vehicle causes damage far out of proportion to the storage saved. Keep those at ground level.
Is a motorized lift worth it if I only need seasonal storage?
Usually not. Motorized lifts earn their higher cost when items are heavy, awkward, or accessed often, or when ladder use is a safety concern. For seasonal bins touched twice a year, fixed platforms free the same floor for far less.
Do I need a professional to install a rack over a parking bay?
Not always — a fixed rack into exposed wood joists is a manageable DIY job for two people with a stud finder, drill, and level. Hire a professional for finished ceilings, metal or concrete structure, motorized lifts, or any doubt about joist strength.
Your Next Drive Into the Garage Should End With Doors That Open Freely
A garage ceiling storage rack is not really a storage purchase; it is a parking purchase. It buys back the bay your car was evicted from, the walkway you have been squeezing through, and the wall your workbench has been waiting for. Measure the vehicle, respect the door tracks, load only what belongs overhead, and check the hardware twice a year. Do that, and the next time you drive in, the doors will open fully and the floor will belong to the car again.