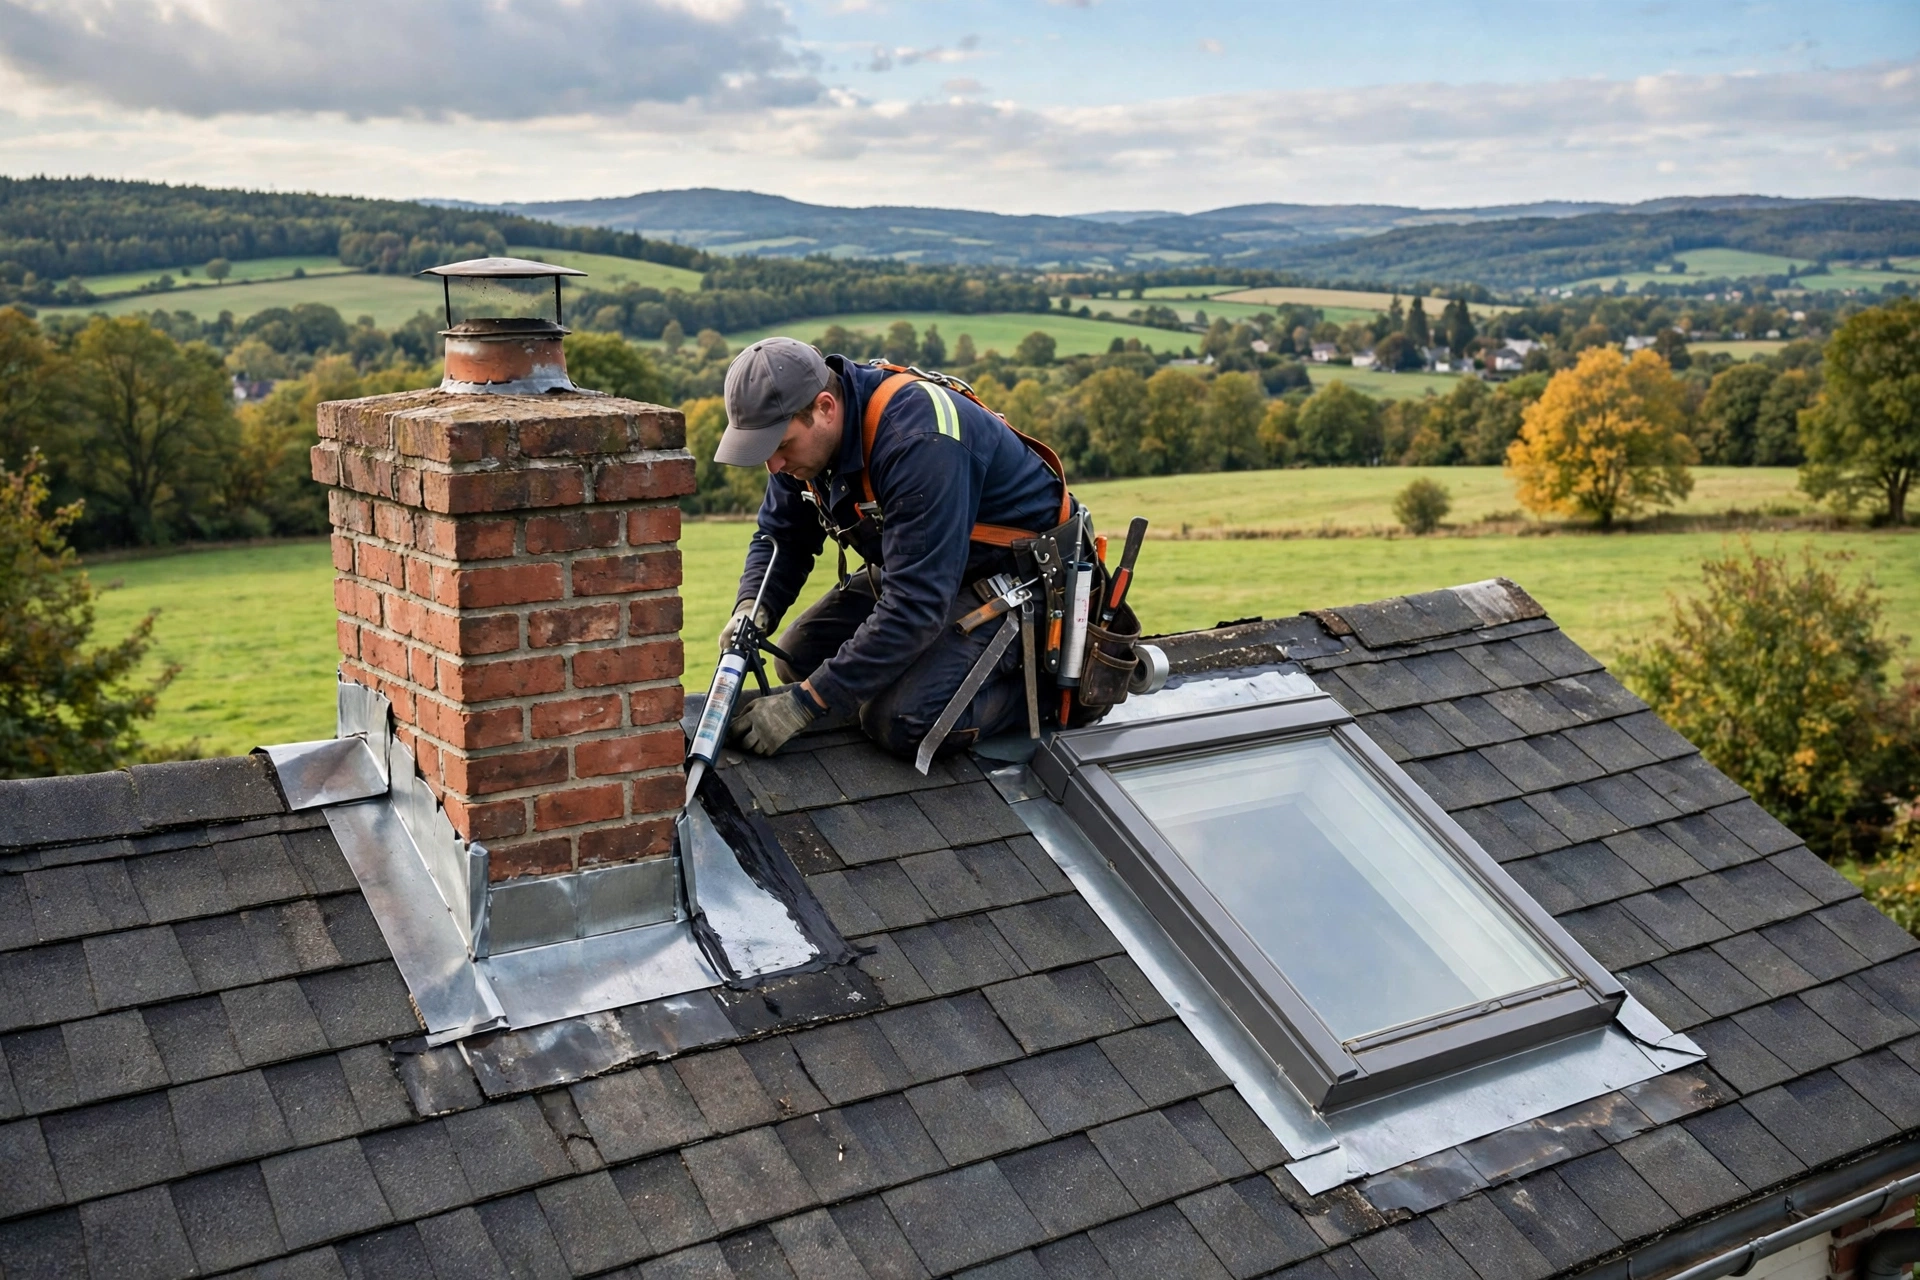
A stain spreading across the ceiling near the fireplace, or a drip beside a skylight that appears only when wind drives rain from one direction, rarely means the whole roof has failed. More often it means a small piece of metal, bent and layered to steer water away from a joint, has given up.
- The short answer: Most chimney and skylight leaks are flashing leaks, not shingle leaks, and the lasting repair replaces the failed flashing system properly — step flashing woven with the shingles, counterflashing set into the masonry, and a factory flashing kit around a skylight — rather than smearing sealant over the top. Sealant buys weeks; correctly layered metal buys years.
Why Chimney and Skylight Flashing Fails First on an Otherwise Sound Roof
Shingles shed water by overlapping like scales so rain runs downhill from one course to the next. Every time something pokes through that surface, the scale pattern is interrupted, and water needs a bridge across the interruption. Flashing is that bridge: thin, durable metal shaped to carry water over and around the obstacle and back onto the shingles below. Chimneys and skylights are the worst interruptions because they are wide and collect debris and snow that hold moisture against the metal. The usual failures are predictable: sealant dries and cracks, fasteners corrode or back out, and step flashing loosens.
Reading the Leak: Flashing Trouble, Roofing Trouble, or Condensation?
Water rarely falls straight down inside a house. It enters at a flashing joint, travels along a rafter, and drips somewhere else entirely, which is why a stain can sit several feet from the chimney that caused it. Inspect from inside first: in the attic within a day of rain, follow any wet line uphill to its highest point. Condensation is the great mimic, especially around skylights in winter: warm, moist household air rises into the skylight shaft and condenses on the coldest surface it finds, often the underside of the glass. If dripping happens on cold, dry days rather than rainy ones, suspect condensation before blaming the roof — fixing that is usually far cheaper than roof work, and no new flashing will cure it.
The Chimney Flashing System, Piece by Piece
A chimney does not have one piece of flashing; it has a small system of overlapping parts. Along each side, step flashing does the work: small L-shaped metal pieces, each woven with a single shingle course, one leg flat on the deck under the shingle and the other standing against the chimney. Apron flashing covers the downhill face and the back pan the uphill face, each diverting water around the sides. Over all of this sits counterflashing, the visible metal band around the chimney. Proper counterflashing is cut into a groove, called a reglet, sawn into a mortar joint, then bent and sealed into that groove so its top edge is physically embedded in the masonry. Counterflashing merely stuck to the brick face with sealant will peel away as the sealant ages, and the joint behind it will open again.
What a Proper Chimney Flashing Repair Looks Like, From Tear-Off to Reglet
A lasting chimney flashing repair rebuilds the joint rather than patching over it.
Tear off. Remove two to four shingle courses with the old step flashing, exposing damaged decking.
Repair the substrate. Replace damaged decking and lay ice-and-water membrane around the chimney base as a second line of defence.
Weave in step flashing. Fit new step flashing, one piece per shingle course, woven in as shingles are re-laid so water always meets a downhill overlap.
Set apron and back pan. Form the apron at the front and the back pan at the rear, with laps tucking beneath the step flashing at the corners.
Set the counterflashing. Cut a fresh reglet into a sound mortar joint, bend the new counterflashing into it, and seal the groove.
Re-shingle and test. Re-lay matching shingles and hose-test from low to high, isolating each side of the chimney.
The Uphill Problem: Why Wide Chimneys Need a Cricket Behind Them
On the uphill side of a chimney, the roof delivers its full flow of water straight at a flat wall, and the water has nowhere to go but sideways or into the joint. For a narrow chimney a well-formed back pan manages this. For a wide chimney it does not, and the standing water, snow, and debris that collect there will defeat even good flashing eventually. The answer is a cricket, also called a saddle: a small peaked structure built behind the chimney that splits the flow and sends water around each side. Building guidance for asphalt shingle roofs commonly calls for a cricket where the chimney is wider than about 30 inches on the uphill side, and many roofers recommend one from around 24 inches.
Skylight Flashing Kits: What the Factory Parts Do That Caulk Cannot
A skylight is a manufactured unit in a framed opening, and its flashing is designed as a kit, not improvised on site: step flashing for the sides, head flashing for the top, a sill apron for the bottom, and sometimes a saddle for the uphill side. A correct installation also carries ice-and-water membrane up the curb and out onto the deck around the opening, so water that gets past the metal still meets a waterproof layer before reaching the framing. This is why a tube of sealant is such a poor substitute: it can close a visible gap at the frame, but it cannot recreate the layered laps of a flashing kit, and it cannot fix a curb that is too low or a missing membrane.
Reflash or Replace: Deciding a Skylight’s Fate Before You Spend on Either
The most expensive skylight mistake is paying to reflash a unit that should have been replaced, then paying again a few years later to replace it anyway, because the labour to open a skylight curb is most of the cost of either job.
The deciding evidence is the glass, the frame, and the curb, checked by probing the curb wood for softness and inspecting the glazing for fogging.
Roof Flashing Repair Prices, and the Details That Push a Quote Up or Down
Prices vary widely with chimney size, roof pitch, access, metal choice, and hidden damage found once the shingles come off, so treat every figure here as an estimate for budgeting, not a quote.
Be wary of the cheapest bid if its scope looks thin. A proposal that offers to smear mastic over the joint instead of cutting a reglet, that skips the cricket on a wide chimney, or that reuses old step flashing to save an hour, is not a bargain — it is the same repair bought twice. Ask every bidder to state the full scope in writing.
Flashing Repair Slip-Ups That Send the Same Leak Back Next Season
Most repeat flashing leaks trace back to a small set of avoidable errors. Sealing over failure instead of removing it traps water behind the metal, where it rots the deck quietly, and the repair fails at the next freeze-thaw cycle. Nailing through exposed flashing faces leaves holes that admit water from day one, since step flashing should be fastened where the next shingle course covers the nail. Reusing old step flashing during a re-roof leaves fatigued pieces that rarely sit flat against a new course. Ignoring the uphill side leaves a flat, debris-collecting back pan on a wide chimney untouched.
Keeping New Flashing Watertight in Twenty Minutes a Season
- Scan the joints: Look for lifted or curled metal edges, rust staining, and cracked or missing sealant around chimney bases and skylight curbs.
- Clear the drainage paths: Keep gutters and valleys clear, because backed-up water rises behind chimneys and overwhelms flashing that would otherwise cope.
- Check from inside: From the attic, look for new damp marks or musty smells near chimneys and skylight shafts after the first heavy rain of the season.
When a Flashing Job Belongs With a Roofer or Mason, Not a Ladder Trip
Some flashing work is genuinely within a careful homeowner’s reach — a ground-level inspection, an attic check, clearing debris — but most flashing repair is not a good do-it-yourself project. Roofs are high, often steep, and unforgiving of a slip, and the work requires removing shingles and cutting into masonry, which are easy to get wrong in ways that only show up months later as a leak. Call a roofer when the repair involves replacing step or counterflashing, cutting a reglet, building a cricket, or working on a steep or tall roof. Call a mason as well when the chimney brickwork is soft, the mortar joints are crumbling, or the crown is cracked. Never go onto a roof alone, in wet or windy conditions, or without fall protection.
Chimney and Skylight Flashing Questions Homeowners Ask Before Booking a Repair
Can a chimney leak be fixed with sealant alone, or does the flashing need replacing?
Sealant alone is a temporary measure, not a repair. It can close a small gap and buy time, but it cannot replace step flashing that has loosened or counterflashing that has pulled out of its mortar joint.
How do I know whether my skylight leak is the flashing or the skylight itself?
Check the unit first: fogging between the glass panes means the glazing seal has failed, and a warped or rotted frame means the unit is done. If glass, frame, and curb are sound, the flashing is the likely culprit.
My chimney is wider than 30 inches and has no cricket — is that a problem?
Yes, it is a known weak point. Wide chimneys collect a large volume of water and debris on their uphill side, and a flat back pan alone struggles to clear it. A cricket splits that flow around the sides and is commonly required by building guidance for asphalt shingle roofs at this width.
Why does my skylight only leak in wind-driven rain?
Wind pushes water uphill and sideways, defeating laps and seals that cope fine with water falling straight down. A leak that appears only in wind-driven rain usually points to a head flashing or side step flashing detail on the windward side, or to a gap where the flashing kit meets the curb.
Should I replace my skylights when I get a new roof?
If the units are more than about ten years old, yes, and the logic is mostly labour: the crew is already on the roof, the shingles around the openings are already off, and the flashing is being rebuilt anyway.
How long should a proper flashing repair last?
A correctly installed flashing system — new step flashing, counterflashing set into a sound mortar joint, and a proper skylight kit — should last for many years, often for the remaining life of the surrounding roof, with only sealant touch-ups at exposed edges.
A Dry Chimney and Skylight Start With Metal Done Right, Not Sealant Done Thick
Chimney and skylight leaks frustrate homeowners because they return. They return, in most cases, for one reason: the joint was sealed rather than rebuilt. Water is patient, and it finds every uphill seam, every exposed nail, and every gap behind a bead of caulk that has dried and cracked in the sun. The durable alternative is straightforward: open the joint, repair what is soft or rotted beneath it, weave new step flashing with the shingles, set counterflashing into the masonry where it belongs, give a wide chimney its cricket, and fit a skylight with its factory kit and membrane. The cheapest price for a sealed joint is the most expensive repair you can buy.