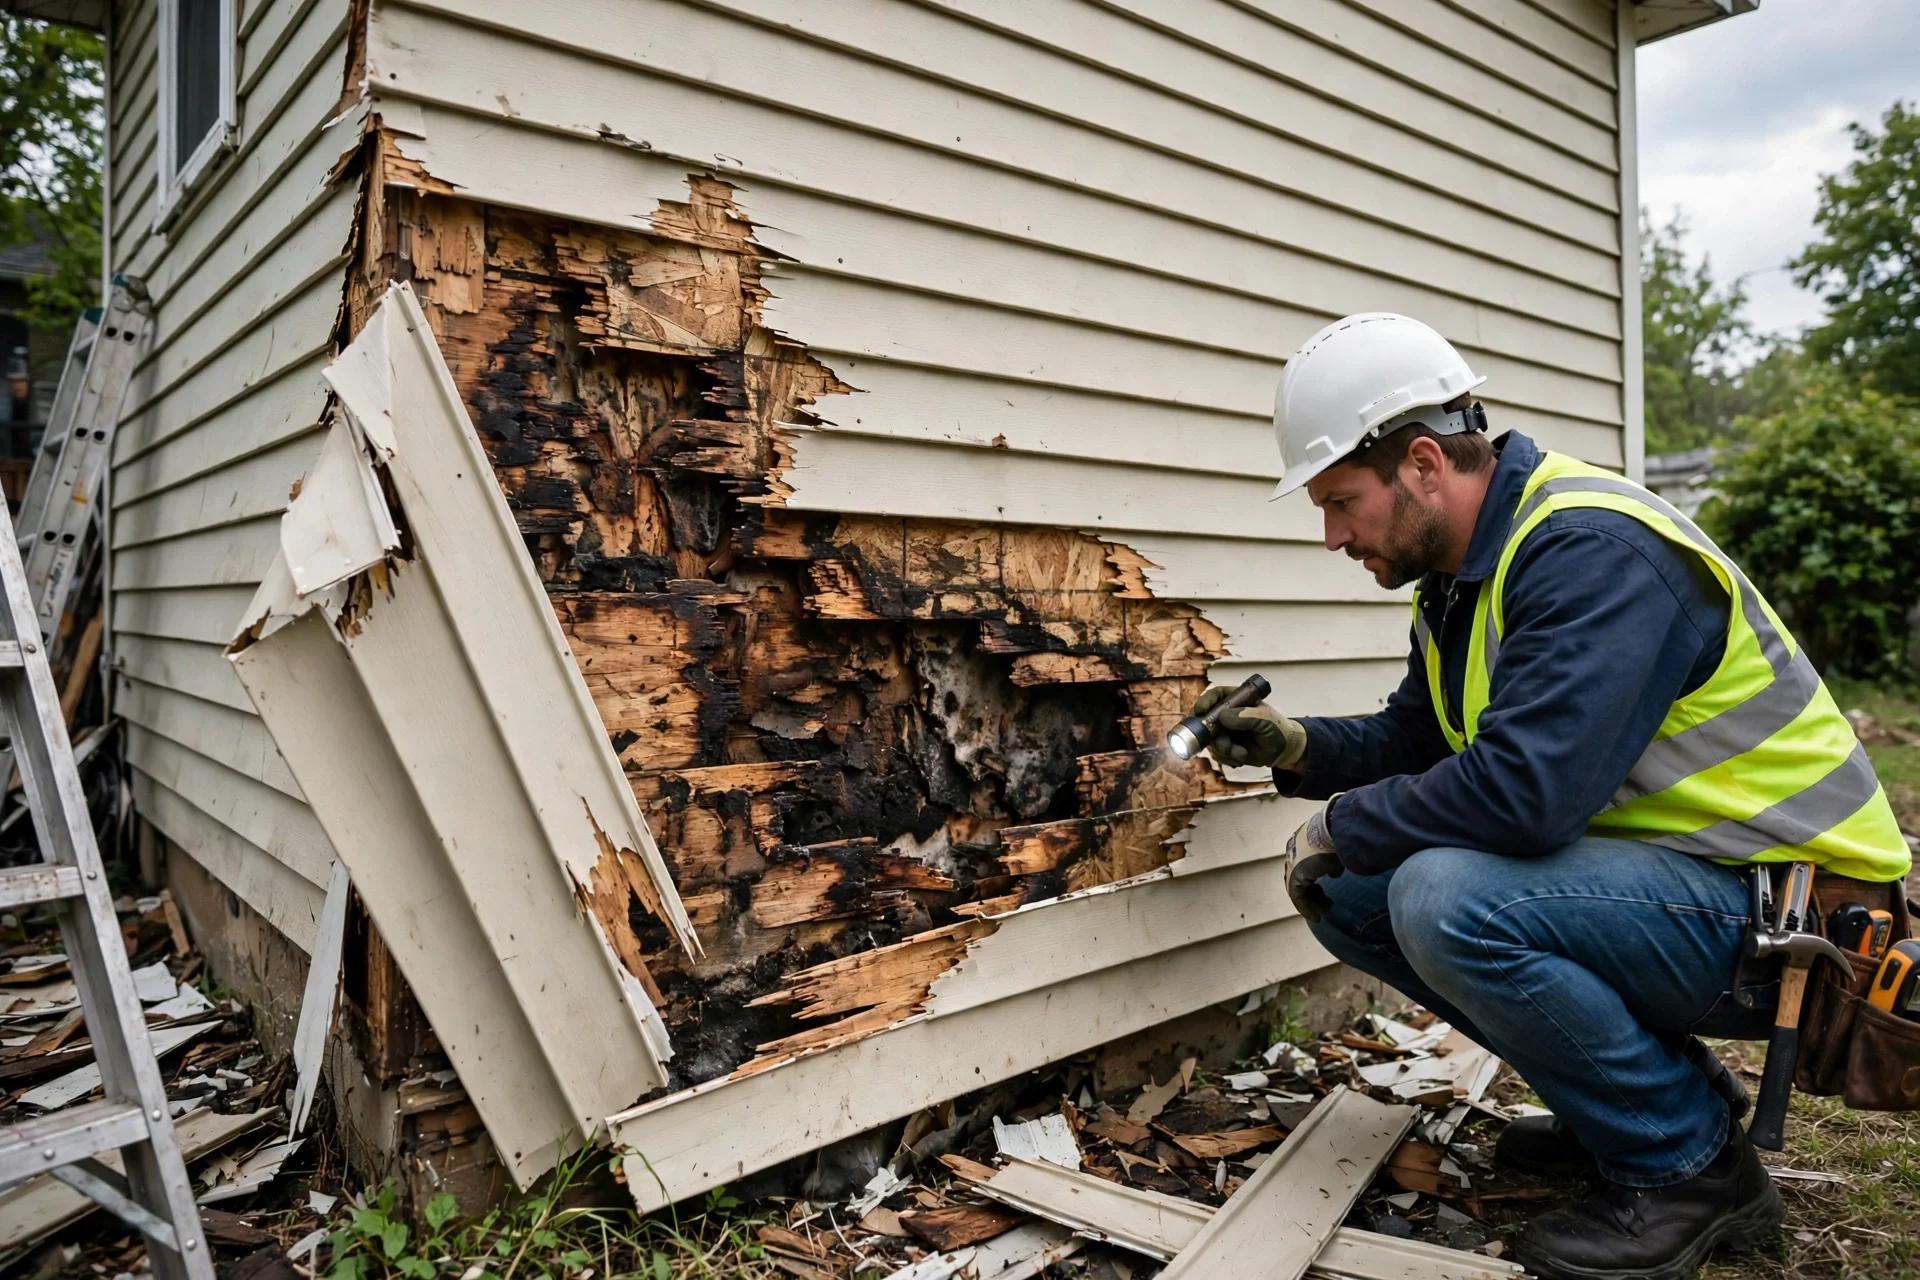
The most effective way to prevent rotting wall sheathing behind vinyl and fiber cement siding is to build a wall that expects water to get in and gives it a way out: a continuous weather-resistive barrier lapped shingle-style, a ventilated rainscreen gap between the siding and the barrier, properly sequenced flashing at every opening and joint, and clearances that keep the siding out of splash zones. Siding sheds most rain, but it is not waterproof — the sheathing survives because of the layers behind it, not because of the siding itself.
Sheathing rot is the quietest expensive failure in residential construction. The siding looks fine from the street while the oriented strand board or plywood behind it softens, swells, and loses its grip on the fasteners. Homeowners usually discover it by accident — a soft spot found during a window replacement, a musty smell that will not go away, or trim that will not hold paint. By then the repair means stripping the siding, replacing sheathing and sometimes framing, and rebuilding the wall correctly. Prevention is a set of details, and every one of them is cheaper than the repair.
Why Sheathing Rots Silently Behind Modern Siding
Wood sheathing rots when it stays wet long enough for fungi to colonize it, and the wall cavity behind siding is very good at staying wet. Water reaches the sheathing through joints in the siding, through failed sealant at windows and penetrations, and through wind-driven rain forced into laps. Once it is behind the cladding, it needs two things to leave: a drainage path downward and airflow to dry it. A wall with siding nailed tight against the barrier, no gap, and no drainage plane has neither. The water sits against the sheathing, wicks into the wood fibers, and the rot process runs unseen for years.
Which Water Paths Reach the Sheathing First
Not every leak is equally dangerous. The paths that rot sheathing fastest are the ones that deliver water repeatedly to the same spot and then trap it there. The roof-to-wall intersection is the worst offender: where a roof meets a wall, water running down the roof concentrates at the joint, and a missing or poorly installed kickout flashing sends that concentrated stream straight behind the siding and down the sheathing. Window and door openings are next, because every opening is a hole through the drainage plane, and a reversed barrier lap or missing head flashing feeds wall water directly into the cavity.
Penetrations are the slow, steady path. Hose bibs, dryer vents, light fixtures, and meter boxes all punch through the siding and the barrier, and each one is a small leak waiting for its sealant to fail. Ground-level splash is the last path: siding installed too close to grade or to a hard surface gets hit by rain bouncing off the ground with every storm, and the bottom courses of sheathing stay damp. Mapping these paths before any work starts is what turns a vague worry about rot into a specific repair list.
- Roof-to-wall joints: missing kickout flashing concentrates roof runoff behind the siding.
- Window and door openings: reversed barrier laps and missing head flashing feed water into the cavity.
- Penetrations: every pipe, vent, and fixture is a sealant joint that will eventually fail.
- Grade and hardscape splash: siding too close to the ground soaks the bottom courses of sheathing.
- Deck ledgers: a ledger bolted through the siding without flashing traps water against the sheathing for years.
The Weather-Resistive Barrier as Your Second Roof
The weather-resistive barrier — housewrap or a similar membrane — is the wall’s real waterproofing layer. It has two jobs: block liquid water that gets behind the siding, and let water vapor escape from inside the house so the wall can dry. Both jobs depend on continuity. Every seam must be taped, every penetration sealed, and every lap run shingle-style so upper layers shed onto lower ones. A barrier with untaped seams or gaps at the corners is not a drainage plane; it is a sieve with a brand name on it.
Rainscreen Gaps: Giving Trapped Water a Way Out
A rainscreen gap is a narrow, ventilated air space between the back of the siding and the face of the weather-resistive barrier, usually created with vertical furring strips or a drainage mat. It does three things that a tight installation cannot: it lets liquid water drain down the face of the barrier instead of sitting against the sheathing, it lets air circulate so the back of the siding and the barrier dry between rains, and it equalizes air pressure across the siding, which reduces the suction that pulls wind-driven rain into joints.
Flashing the Openings, Corners, and Roof-to-Wall Joints
Flashing is where most walls fail, because it is a sequence rather than a product and sequences are easy to get wrong. The rule is the same everywhere: upper pieces overlap lower pieces, and every piece directs water outward. At windows, the head flashing goes on last so it overlaps the jamb flashing, and the barrier above laps over the head flashing. At corners, the barrier wraps continuously and the corner boards are flashed so water cannot enter at the joint. At roof-to-wall intersections, a step flashing sequence runs up the wall with the shingles, and a kickout flashing at the bottom diverts the concentrated runoff into the gutter instead of behind the siding.
The kickout deserves emphasis because it is small, cheap, and responsible for a disproportionate share of rotted sheathing. It is a small diverter, usually bent metal, installed where a roof edge meets a wall, and it kicks the water running down the roof-wall joint outward into the gutter. Without it, that water runs down the wall behind the siding for the life of the roof. When you inspect a wall, the first place to look is the bottom of every roof-to-wall joint: if there is no kickout, assume the sheathing behind it has been wet.
| Detail | What good looks like | What failure looks like |
|---|---|---|
| Kickout flashing | Water diverted into the gutter at the roof-wall joint | Stained siding and soft sheathing at the bottom of the joint |
| Head flashing | Metal cap over the window, lapped by the barrier above | Peeling paint and rot at the top corners of the window |
| Corner boards | Barrier wrapped continuously; joints flashed and sealed | Rot starting at the inside corner where two walls meet |
| Deck ledger | Flashing over the ledger and behind the siding above it | Rotted sheathing and rim joist behind the deck |
| Penetration seals | Flashing boot or tape sealed to the barrier | Cracked caulk and damp sheathing around the fixture |
Vinyl and Fiber Cement: Different Siding, Different Moisture Risks
Choosing between vinyl and fiber cement is partly a moisture decision, and the right answer depends on the climate and the installation quality available. Vinyl is inexpensive, sheds water well, and never rots itself, but it is a hollow system that hides trouble and must be installed loosely enough to expand and contract — up to five-eighths of an inch over a long run with seasonal temperature change. Nailing it tight stops the movement and can trap water. Fiber cement is heavier, more expensive, and far more durable, but its cut edges absorb water unless primed, and its butt joints must be left to drain rather than caulked shut.
| Factor | Vinyl siding | Fiber cement siding |
|---|---|---|
| Moisture behavior | Sheds water; hollow back can hide trapped moisture | Stable; absorbs water at unprimed cut edges |
| Rainscreen benefit | High — prevents hidden moisture against sheathing | High — lets boards and barrier dry from behind |
| Joint treatment | Leave laps free to move; never caulk the weeps | Caulk trim joints only; leave butt joints open to drain |
| Inspection need | Check behind panels every few years | Check caulk at trim every 2–3 years |
| Typical service life | Roughly 20–25 years for insulated panels | Roughly 40–50 years with proper maintenance |
Inspection Habits That Catch Rot Before It Spreads
Sheathing rot is cheap to catch early and expensive to catch late, so the inspection routine matters as much as the installation. Twice a year — after the wet season and before it — walk the walls and look for the small signs: paint that blisters or peels at the bottom of a wall, trim that feels soft when pressed with a fingertip, siding that has pulled away from a corner, or a faint musty smell near an exterior wall inside the house. Probe suspicious trim with a screwdriver; sound wood resists, rotted wood gives way.
Pay special attention to the spots the water paths predict: the bottom of every roof-to-wall joint, the corners of every window, the ledger line of any deck, and the bottom two courses of siding. A moisture meter pressed against the interior drywall near those spots can confirm a suspicion without opening the wall. If the meter reads high, open a small section of siding or drywall and look — a small exploratory opening now is always cheaper than a wall rebuild later.
- After every major storm: check for loose panels, cracked caulk, and water stains at the wall base.
- Twice a year: walk the walls and probe trim at windows, corners, and roof-to-wall joints.
- At the grade line: keep siding at least six inches above soil and one to two inches above hard surfaces.
- At gutters: clean gutters and downspouts so overflow does not run down the wall.
- After any siding work: confirm the barrier and flashing are intact before the siding goes back on.
When Rotted Sheathing Means Opening the Wall With a Professional
Surface fixes stop working once the sheathing itself is compromised. If probing reveals soft sheathing, if the rot extends into studs or the rim joist, or if the wall has lost fastener holding power — siding nails pulling out, trim that will not stay attached — the wall needs to be opened, the damaged material removed, and the assembly rebuilt with correct barrier, flashing, and rainscreen details. That is a contractor’s job, not a caulking job, and it should be done by someone who understands building envelopes rather than by whoever can strip siding fastest.
Wall Sheathing Rot Behind Siding: Questions Homeowners Ask
Can sheathing rot even if the siding looks perfect?
Yes, and that is the usual case. Siding is designed to shed water, not to be waterproof, and the rot happens behind it where nobody can see. The first visible signs are usually paint failure, soft trim, or a musty smell — all of which appear long after the sheathing started rotting.
Is a rainscreen gap really necessary?
In wet climates it is one of the highest-value details in the wall. A quarter-inch ventilated gap lets water drain and the wall dry, and it removes the trapped-moisture condition that causes most sheathing rot. In very dry climates it matters less, but it rarely hurts.
Why should fiber cement butt joints not be caulked?
Because those joints are designed to move with temperature and to drain. Caulking them shut traps water behind the boards and stops the joint from moving, which cracks the caulk and the board. Caulk belongs at the vertical trim around windows, doors, and corners — not at butt joints or channels.
How do I check for rot without tearing off the siding?
Probe the trim with a screwdriver, look for paint failure and soft spots at the usual water paths, and use a moisture meter on the interior drywall near windows and roof-to-wall joints. A small exploratory opening behind a piece of trim gives a definitive answer with minimal damage.
Does housewrap alone prevent sheathing rot?
No. Housewrap is one layer of the system, and it only works when it is continuous, taped, lapped correctly, and paired with flashing and a drainage path. A barrier with untaped seams or reversed laps can actually channel water into the wall instead of away from it.
How often should I reseal siding joints?
As a rough guide, vinyl joints need attention every five to ten years, fiber cement trim caulk every two to three years, and wood siding every three to five years. The real schedule depends on exposure and climate — inspect annually and reseal when the caulk cracks or pulls away, not on a fixed calendar.
Final Thoughts on Keeping Wall Sheathing Dry for Decades
Sheathing survives when the wall is built as a drainage system, not as a sealed box. A continuous barrier, a ventilated gap, sequenced flashing, and clearances at the ground give water a path out and air a path in, and those two paths are what keep wood dry. Inspect the usual water paths twice a year, fix the small details before they become wall openings, and the sheathing behind your siding will outlast the siding itself.