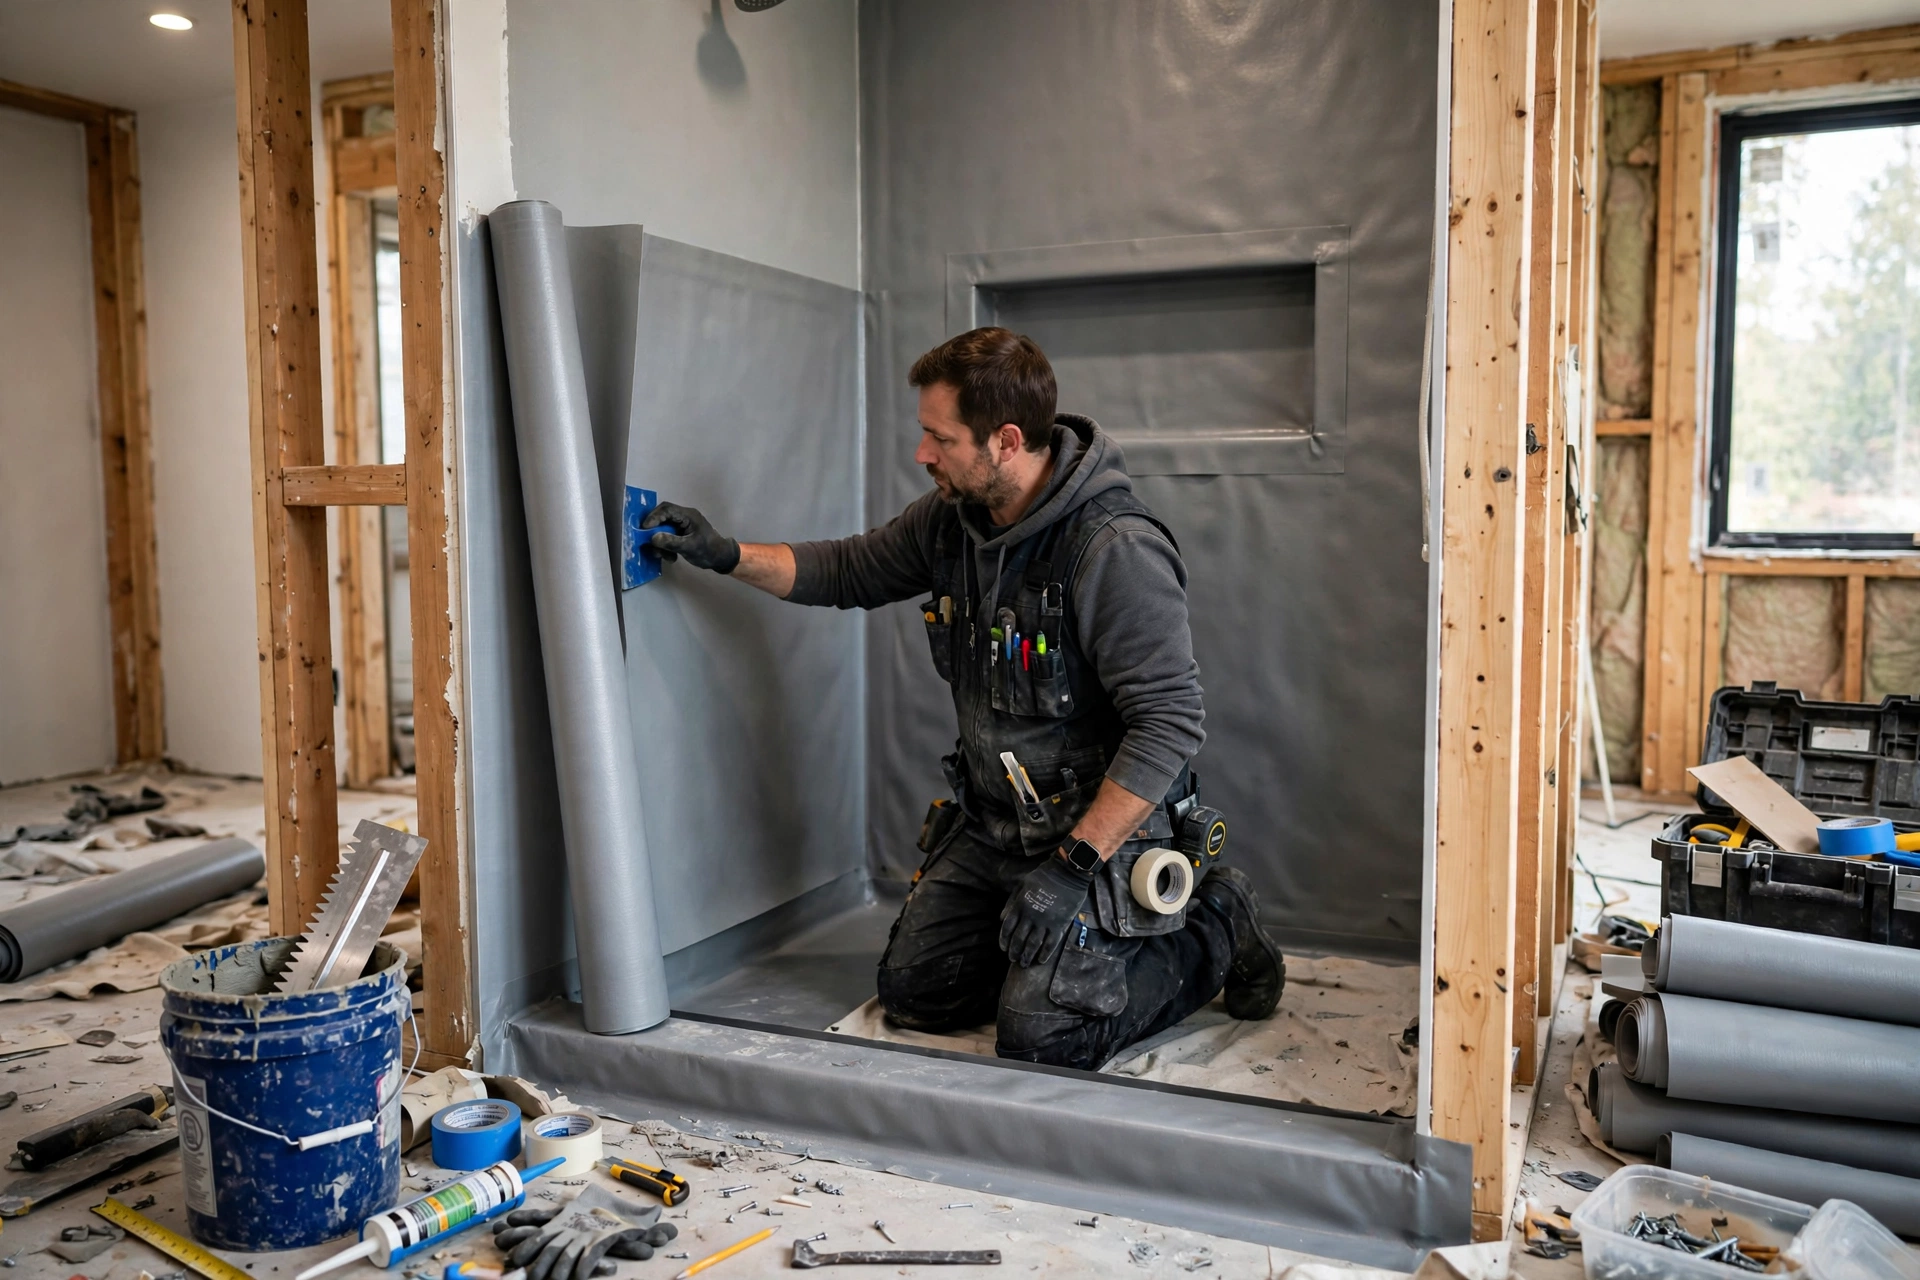
Tile itself is not waterproof, and that single fact explains most shower failures in small homes. Grout is porous, tiles can crack, and water will find any gap, seam, or joint it can. The layer that actually keeps water out of the walls and floor is the waterproofing membrane underneath the tile, and choosing the wrong one — or installing the right one badly — can lead to mould, swollen plasterboard, and rot that only becomes visible years later, when the repair is far more expensive.
The short answer is to match the membrane to your shower’s shape, substrate, and skill level: sheet membranes suit flat, regular showers where a continuous, predictable barrier matters; liquid membranes suit irregular shapes, niches, and many corners; and uncoupling membranes suit floors where movement or cracking is a concern. Whichever type you choose, the membrane must be continuous, properly detailed at corners, drains, and penetrations, and compatible with the tile adhesive you will use over it.
What a Shower Waterproofing Membrane Actually Does Under Tile
A waterproofing membrane is a continuous barrier between the tile assembly and the structure behind it. It does not stop water reaching the tile surface — that is normal in a shower — but it stops water passing through grout joints and tile cracks into the wall or floor structure. Without it, water soaks into plasterboard, timber, or screed, where it feeds mould and weakens materials that were never designed to stay wet. With it, water that gets past the tile is directed safely to the drain or held back until it dries.
This distinction matters because many homeowners assume that sealing grout, or choosing a large-format tile with fewer joints, is enough. Grout sealers reduce absorption, but they are not a waterproofing system, and they wear over time. A membrane, by contrast, is designed to remain waterproof even if a grout joint cracks or a tile chips. That is why building guidance and tile industry standards treat waterproofing as a system, not as a single product: membrane, seams, corners, drain connection, and adhesive must all work together.
Sheet, Liquid, and Uncoupling Membranes Explained for Small Showers
Sheet membranes are thin, flexible sheets, often a polyethylene fabric with a fleece backing, bonded to the substrate with thin-set mortar. They give a uniform thickness and instant waterproofing over large, flat areas, which makes them popular for straightforward shower walls and floors. Their weakness is detailing: every corner, pipe penetration, niche, and drain needs careful cutting, folding, and sealing with compatible bands and collars, and a missed seam is a leak waiting to happen.
Liquid membranes are roller- or brush-applied coatings that cure into a flexible, seamless film. They excel where a shower has many corners, a curved bench, a niche, or awkward pipe positions, because the liquid coats every shape without seams. Their weakness is thickness control: the film must reach the manufacturer’s specified thickness, usually in two coats, and thin spots or pinholes compromise the barrier. Uncoupling membranes, with their distinctive studded or waffle pattern, combine waterproofing with crack isolation, separating tile movement from substrate movement, which is valuable on floors that may crack or flex slightly. They are less commonly used as the sole wall membrane in a small shower, but they are a strong choice for shower floors.
- Sheet membrane: predictable thickness, best on flat, regular surfaces.
- Liquid membrane: seamless, best on irregular shapes, niches, and many penetrations.
- Uncoupling membrane: waterproofing plus crack isolation, best on movement-prone floors.
Matching a Shower Membrane to Your Substrate and Tile
The substrate determines much of the choice. Cement backer board, concrete, and masonry are common shower substrates and generally accept both sheet and liquid systems, provided they are clean, dry, and sound. Standard plasterboard is not suitable as a shower substrate in wet areas, even with a membrane over it, because once water reaches it, it deteriorates; if your shower walls are plasterboard, the substrate itself needs to change, not just the membrane. Always check the membrane manufacturer’s list of approved substrates before buying, and do not assume a product that worked on concrete will work on every board type.
Tile choice matters too. Large, heavy tiles need an adhesive and membrane combination that can support their weight on walls, while mosaic tiles, with many grout joints, let more water through to the membrane, making a robust, continuous barrier even more important. Natural stone tiles are more porous than glazed ceramic or porcelain, so they benefit from a membrane system that is fully detailed and from sealing the stone itself, as a separate step. If you are unsure about compatibility between membrane, adhesive, and tile, ask the manufacturers or a tile professional before you start, as incompatible combinations can fail even when each product is good on its own.
Corners, Drains, Niches, and Seams: Where Small Showers Leak First
Most shower leaks do not start in the middle of a wall; they start at a detail. Inside corners, where two walls meet, and the junction between wall and floor, are movement points that crack if they are simply filled with grout. These joints need a flexible waterproofing band or a membrane detail that can move slightly without splitting. The same applies to pipe penetrations for the shower valve and head, and to the drain, where the membrane must connect to the drain flange exactly as the drain manufacturer specifies, so water cannot slip underneath the membrane at the most water-exposed point in the shower.
Niches and benches are the other common leak points in small showers, because they add many internal corners and horizontal surfaces where water sits. A niche needs the same membrane continuity as the walls, with corners properly banded and the base sloped slightly so water drains out rather than pooling. If you are fitting a niche or bench for the first time, a liquid membrane can be easier to detail around these shapes, provided you build up the specified thickness and check for pinholes. Whatever system you use, take time at these details: a perfect field of membrane with a failed corner is not a waterproof shower.
Applying a Shower Membrane Correctly in a Small Home
Preparation comes before product. The substrate must be clean, dry, free of dust and loose material, and flat enough that the membrane can bond evenly. Fill large gaps and repair damaged areas first, and prime only if the manufacturer requires it for your substrate. For a sheet system, mix the thin-set to the right consistency, comb it evenly, press the sheet into place without wrinkles or air pockets, and seal every seam with the specified overlap and banding. Work in a logical order, usually from the floor up the walls, so overlaps shed water correctly.
For a liquid system, apply the first coat evenly, let it dry to the manufacturer’s stated time, and apply the second coat at right angles to the first, checking the wet film thickness as you go. Reinforce corners, joints, and penetrations with the specified fabric or band before or between coats, as the product requires. Do not tile over a membrane that is still wet, tacky in a way the instructions do not allow, or visibly thin in places. A flood test, where the shower floor is plugged and filled with a shallow depth of water for a set period, is a valuable check before tiling, and it is far cheaper to find a leak at this stage than after the tiles are fixed.
Shower Membrane Options Compared for Small Homes
Cost, skill, and shower shape together usually decide the choice. Sheet systems often cost more in materials but give a predictable result on flat showers, and they are the system many professionals prefer for standard installations. Liquid systems often cost less in materials, are more forgiving on irregular shapes, and suit confident DIYers, but they demand careful thickness control and drying time. Uncoupling systems sit at the higher end of material cost but add crack protection that can save a floor from future tile cracking.
Shower Waterproofing Mistakes That Ruin Tile in Small Homes
The most expensive mistake is tiling over an unsuitable substrate, such as standard plasterboard in a wet area, and hoping the membrane will compensate. It will not, because the substrate itself will fail once water reaches it. Another is skipping the details: grouting a wall-to-floor joint instead of using a flexible, waterproofed joint, or leaving a pipe penetration unsealed. A third is applying a liquid membrane too thinly, or tiling over it before it has cured, which leaves a barrier that looks complete but is not.
Using the wrong adhesive over the membrane is another common failure. Some membranes require a polymer-modified cement adhesive, not a premixed mastic, and using the wrong one can prevent a proper bond or damage the membrane. Always read both the membrane and adhesive instructions together, and do not mix systems from different manufacturers unless they are explicitly stated to be compatible. If any part of the system is unclear, or if the shower involves a steam function, a timber floor, or a complex drain, call a tile professional or waterproofing specialist before tiling, as these situations have details that general guidance cannot cover.
Final Thoughts: Choosing a Shower Membrane That Protects Your Small Home
In a small home, a shower leak does not stay small for long, because the damaged wall or floor is often shared with another room. Choose the membrane that suits your shower’s shape and substrate, detail the corners, drains, and niches with care, and use a compatible adhesive. Done properly, the membrane will be invisible for the life of the shower, which is exactly how waterproofing should be: unnoticed, because it is working.
Shower Waterproofing Membrane FAQs – for Small Homes
Do I need a waterproofing membrane if my shower tiles are porcelain?
Yes. Porcelain tiles themselves absorb very little water, but grout joints are porous and tiles can crack, so water still reaches the substrate. A membrane is the layer that protects the structure behind the tile, regardless of the tile type.
Is a liquid membrane or a sheet membrane better for a small shower?
It depends on the shape. Sheet membranes suit flat, regular showers with predictable detailing, while liquid membranes suit irregular shapes, niches, and many penetrations because they form a seamless film. Both work well when applied to the specified thickness and detailing.
Can I use a waterproofing membrane over standard plasterboard?
No, not as a fix for an unsuitable substrate. Standard plasterboard deteriorates when wet, so shower walls in wet areas need a suitable backer board or substrate first. Check the membrane manufacturer’s approved substrates before starting.
How do I know if a liquid membrane is thick enough?
Follow the manufacturer’s specified wet and dry film thickness, apply the stated number of coats, and check thickness as you work, using a wet film gauge if recommended. Thin spots and pinholes are the main risk, so a second coat at right angles helps ensure coverage.
Should the membrane connect to the shower drain?
Yes, and this detail is critical. The membrane must connect to the drain flange exactly as the drain manufacturer specifies, so water cannot pass underneath the membrane at the drain. A flood test before tiling can confirm the connection is sound.
Can I tile the same day I apply a liquid membrane?
Only if the manufacturer allows it for that product and the membrane has cured as specified. Most liquid membranes need a stated drying or curing time between coats and before tiling, and tiling too early can damage the film and weaken the bond.