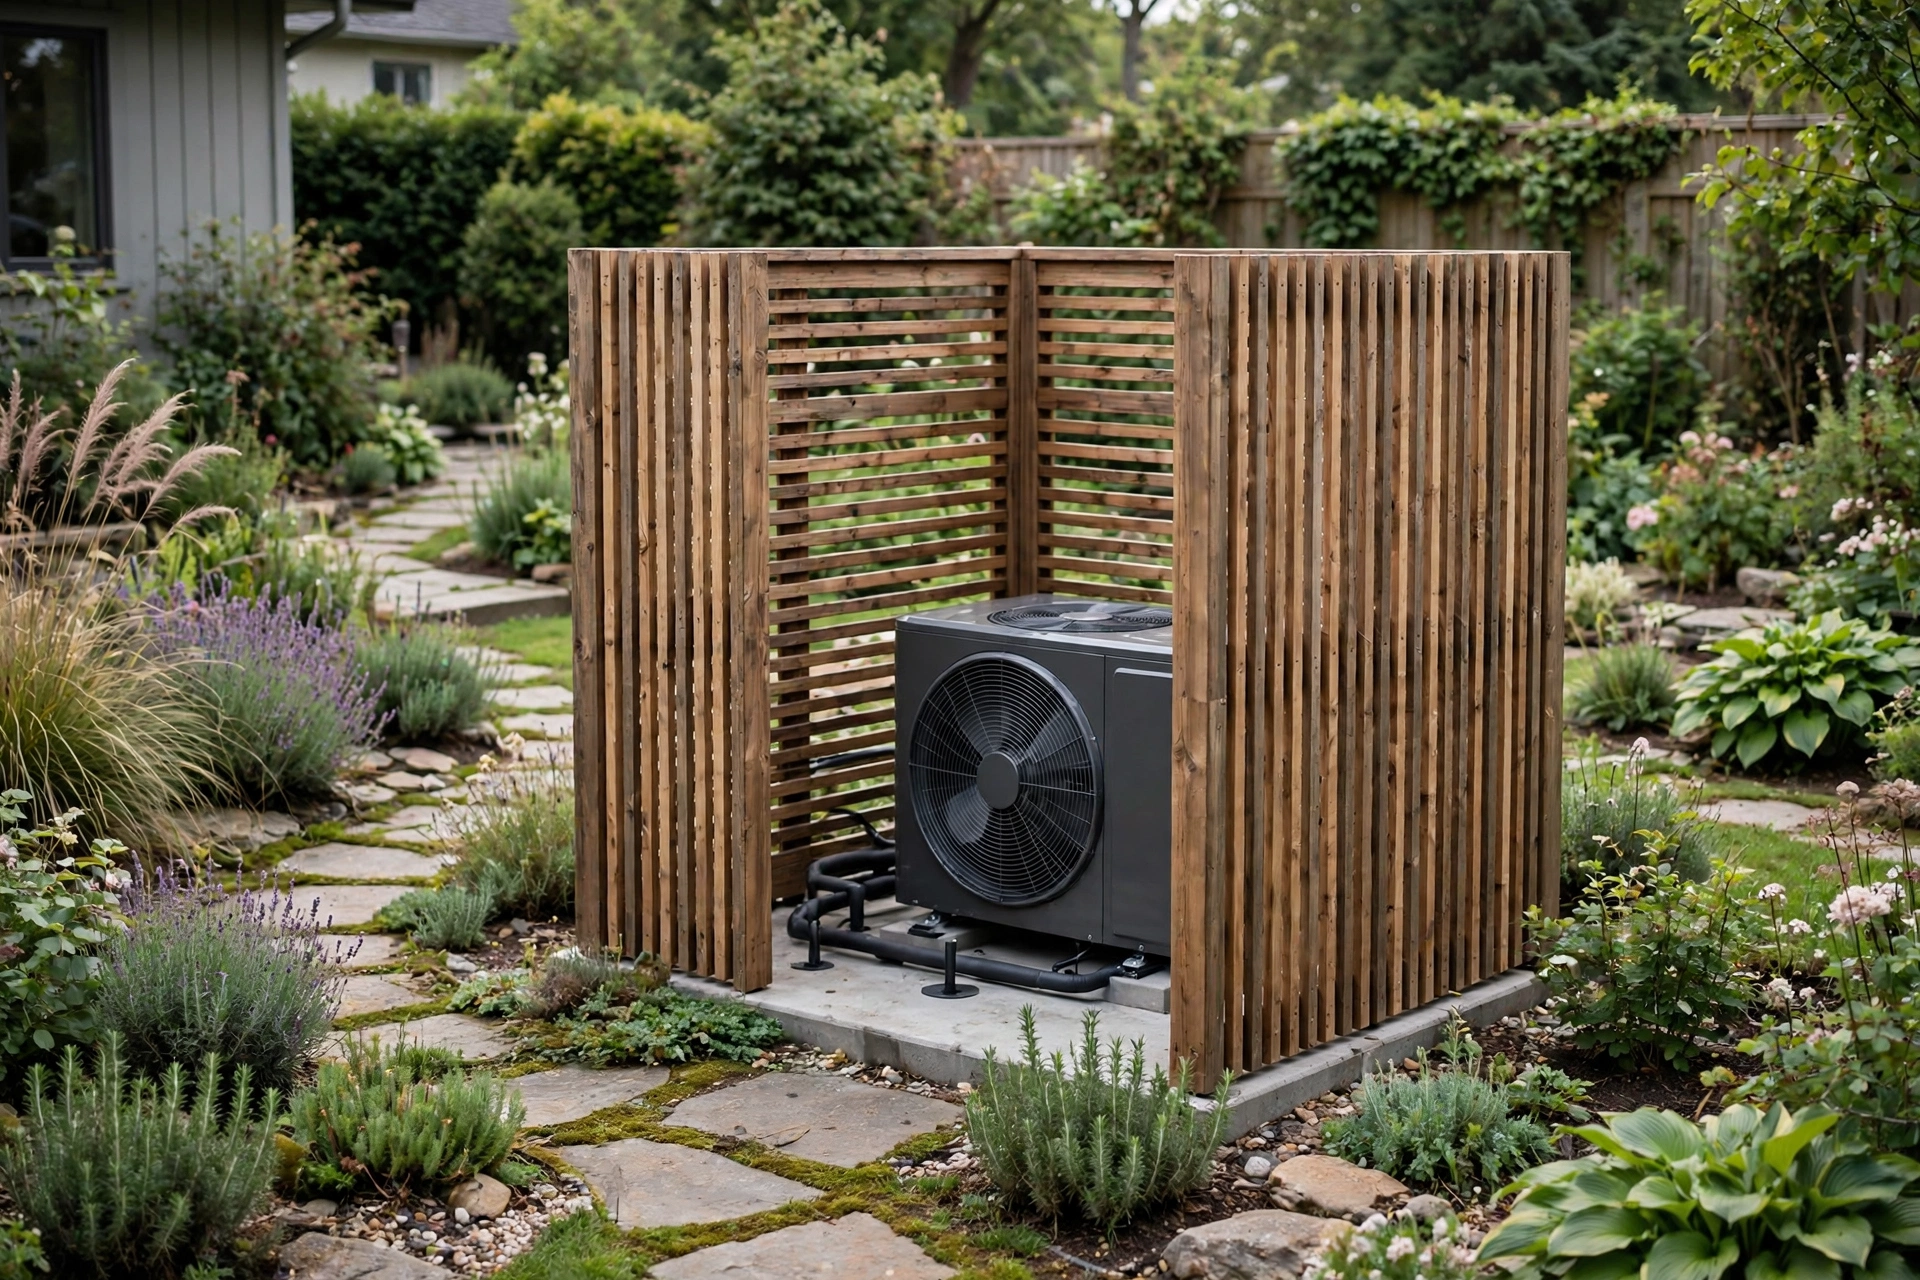
An outdoor heat pump is a hard-working box that most homeowners would rather not look at, yet it is also a machine that survives on fresh air. Hide it badly and you pay twice, in higher running costs and early compressor repairs. Hide it well and the unit all but disappears while performing as intended. The difference is the air gap around it.
The short answer is this: yes, you can screen an outdoor heat pump, but only with an open, ventilated design that respects the clearances in your unit's installation manual. Keep at least the manufacturer's minimum gap on every side, never roof the unit over, leave the fan discharge completely open above, and make at least one panel removable so a technician can reach the service side. A slatted or louvred screen set well clear of the cabinet, with roughly half its surface open to the air, hides the unit without starving it of airflow.
The Short Answer: A Screen That Lets Your Heat Pump Breathe
Most homeowners picture a neat wooden box around the unit, perhaps with a planter on top. That is exactly what you must avoid. A heat pump draws air in through the back and sides of its cabinet and blows it out through the fan, usually on the front or the top. Anything blocking that path forces the unit to re-breathe its own exhaust air, a problem engineers call recirculation. In heating mode the cold discharge air gets sucked back in, so the unit works harder and ices up more; in cooling mode the same trap raises pressure and can trip the system. A good screen is therefore not a box at all but a visual filter: panels that break up the sightline from the patio or neighbouring windows while leaving generous gaps for air. Note the difference from a winter cover, which must come off before the system runs: a screen stays in place while the system runs every day, so airflow comes first, appearance second.
How a Heat Pump Moves Air, and Why That Dictates the Screen
Three air paths decide nearly every rule in this article. The intake path runs through the coil, usually across the rear and side panels of the cabinet. The discharge path runs out through the fan and needs a long, unobstructed throw so exhausted air can disperse instead of curling straight back into the coil. The third is the service path: room for a technician to open panels and clean the coil. These paths explain the key rules. Intake sides need open, slatted panels rather than solid boards. The discharge side needs the most room of all, and a screen placed directly in front of the fan is the single most damaging mistake you can make. The top must stay open, since most units discharge upward and a roof traps exhaust air and drops snow and leaves onto the fan grille.
Reading Your Unit's Manual Before You Measure Anything
Every heat pump model has its own clearance figures, and those figures outrank any general advice in this article. Some manufacturers ask for as little as 300 millimetres behind the unit, while others want 450 to 600 millimetres on the intake sides and a metre or more in front of the fan. A few manuals also demand 1.2 to 1.5 metres of clear space above the unit. Find the installation section, write the numbers down, and treat them as the absolute minimum: generous clearances cost nothing, tight ones cost real money over the unit's life. While you have the manual open, note which side carries the service panel and which side the fan discharges from. The service side needs a removable panel wide enough for a person and a toolbox, and the discharge side needs the longest clear run into open garden. In an inside house corner, be extra careful: two walls already bounce exhaust air back toward the coil.
Slatted Timber Screens: The Forgiving Classic for Most Gardens
Horizontal or vertical timber slats are the most popular heat pump screen for good reason: they are cheap, easy to build, easy to repair, and naturally ventilated. Aim for slats with gaps of roughly 20 to 30 millimetres, keeping the open area of the panel around 40 to 50 percent. From a few metres away the unit is barely visible, especially with horizontal slats stained to match the fence or trim. Cedar and redwood resist rot without treatment, but pressure-treated softwood works fine if kept off the ground and weatherproofed. Keep the screen base at least 50 millimetres above soil or mulch, and never let soil or stone pile against the cabinet, where wet material encourages rust and can block the condensate drain. Timber's advantage is forgiveness: a warped board is a one-board repair.
Louvred Panels and Angled Slats: Hiding More Without Choking the Fan
Louvres are slats set at an angle, like a fixed Venetian blind, and they are the best option when you want more privacy than a flat slatted screen can give. Because the slats overlap from the viewer's angle, a louvred panel can hide the unit almost completely from a standing viewpoint while still leaving a clear path for air. Good louvre designs aim for at least 50 to 60 percent free area, with slats angled downward to shed rain. Ready-made louvred panels come in aluminium, composite, and treated timber; they cost more than plain slats and need occasional brushing. Put louvred panels on the intake sides and keep the discharge side as open as possible. Check free area before buying: narrow slots can look open yet block half the airflow.
Lattice, Mesh and Living Screens: Where Greenery Helps and Where It Hurts
Lattice panels and mesh screens are the softest-looking option, suiting gardens where a timber fence would feel too heavy. Lattice conceals moderately with decent airflow, but its smaller open area means it should sit further from the unit. Mesh offers excellent airflow but clogs with leaves and dust, becoming a solid wall, so make mesh panels removable and inspect them twice a year. Living screens are the most tempting and the most dangerous option. Plants grow: a shrub planted a metre from the unit will be brushing the cabinet within two seasons, shedding leaves into the coil. For a planted screen, keep plants a metre from the cabinet, choose low-litter species, and prune twice a year. A good compromise: a slatted screen for the working sides, with planting in front of it.
Metal, Composite and Ready-Made Panels: Low-Maintenance Screens Compared
Powder-coated aluminium panels are light, rust-proof, and suit modern houses well. Composite boards resist rot and hold their colour but are heavier to cut on site, while vinyl panels are cheapest but can warp in strong sun. Ready-made panels also lift off easily, which matters since the service panel opens at least yearly. Judge any material by free area, easy removal, and how it looks after five winters.
Building Your Heat Pump Screen Step by Step
A well-planned screen goes up in a weekend; most of the work is measuring. Start with the clearances and let those numbers set the footprint.
Measure the unit and mark the footprint, adding your manual's clearances on every side, and check that the discharge side has the longest clear run into open garden.
Set posts outside the clearance zone, clear of the drain, pipework, and defrost water path.
Build the frame with a removable service panel, fixed with screws or clips rather than nails, so it lifts off with a single screwdriver.
Fix the slats or louvres with consistent gaps using a spacer block, keeping the bottom of every panel at least 50 millimetres above the ground.
Leave the top completely open. Do not add a cap, a roof, or a planter shelf over the unit.
Test before finishing: run the unit, check for a strong steady discharge stream, and confirm every panel removes and the coil is reachable.
Screening Slip-Ups That Starve a Heat Pump of Air
Most heat pump screens fail in the same handful of ways, and every one is avoidable. The first is building too close: a screen that looks generous can still be too tight on the intake side, so measure from the cabinet, not the often-larger concrete pad. The second is roofing the unit: a solid top, a deck above, or dense overhead planting traps the discharge like a lid. The third is sealing the discharge side: a screen placed squarely in front of the fan, even a slatted one, deflects exhaust back toward the coil. The fourth is forgetting maintenance, since an unremovable screen means skipped coil cleaning. The fifth is planting too close, and the sixth is ignoring drainage: defrost water dammed against the cabinet causes corrosion and ice problems no airflow can fix.
What a Heat Pump Screen Costs, and Keeping It Working Year After Year
A basic DIY slatted timber screen typically costs only posts, boards, screws, and finish, and many homeowners build one cheaply from standard fence boards. Cedar, large units, and matching finishes cost more; ready-made panels cost more per panel but save a weekend of labour. Those figures are estimates, excluding electrical or refrigerant work, which a screen alone should not need. Against the cost of getting it wrong, a screen is cheap insurance: a restricted unit runs longer, uses more power, and wears its compressor faster. Nor is a screen fit-and-forget. Twice a year, clear leaves from the base and coil fins, check no plant has entered the clearance zone, and confirm every panel still lifts off. Keep snow clear in winter and trim fast growth in summer.
When a Screened Heat Pump Needs an Installer, Not a DIY Fix
Most screening work is safe DIY, but moving the unit, altering pipework, or touching the electrical supply belongs to a qualified installer: refrigerant pipework and the electrical disconnect are not DIY jobs. The same applies to wall- or roof-mounted units, or where a screen changes wind or snow loading. Also call one if the unit already shows trouble: short cycling, frequent icing, error codes, rising bills, or a strained fan. A screen will not fix a struggling unit. Regulatory boundaries matter too: planning rules may set noise limits, boundary distances, or size limits, and a screen does not exempt you. A panel reflecting sound toward a neighbour can worsen noise, so discuss acoustic options with your installer.
Final Thoughts: Does a Heat Pump Screen Suit Your Garden?
A heat pump screen is worth building when it solves a visual problem without creating an airflow problem. If the patio view barely shows the unit, a technician can still reach every side, and the fan still throws air into open garden, you have succeeded. If the unit runs longer and louder than before, the screen needs to come further out or come down. Start with the manual, build with gaps, leave the top open, keep one panel removable.
Heat Pump Screening Questions Homeowners Ask Before Building
Can I put a fence around my heat pump?
Yes, provided the fence is an open, ventilated screen rather than a solid enclosure, and it respects the clearances in your unit's manual. Keep it at least the manufacturer's minimum distance from the cabinet, leave the top open, and make one side removable for servicing.
How far should a heat pump screen sit from the unit?
Follow your manual first; as a guide, plan 450 to 600 millimetres on the intake sides and rear, 1 to 2 metres in front of the fan, and no roof above. Lattice and mesh should sit at the wider end of those ranges.
Will a screen make my heat pump quieter?
A screen can soften sound slightly, but it is not a reliable noise solution: sound travels over and around it, and a badly placed panel can reflect noise toward a neighbour. Distance and positioning matter far more.
Can I cover my heat pump in winter instead of screening it?
No, not while the system is running. A full winter cover blocks airflow, traps moisture, and can cause icing and compressor damage. Heat pumps manage frost with their own defrost cycle. A ventilated year-round screen is fine; an enclosing wrap is not.
What plants are safe to grow near a screened heat pump?
Low, slow-growing plants that drop little leaf litter are safest, planted at least a metre from the cabinet and kept pruned. Avoid vigorous climbers, bamboo, and large shrubs, and never let plants touch the cabinet, coil, or fan grille.
Do I need planning permission for a heat pump screen?
Usually a garden screen needs no permission, but the installation may face planning conditions on noise, distance, or size, and a screen does not override those. Check local rules before building.