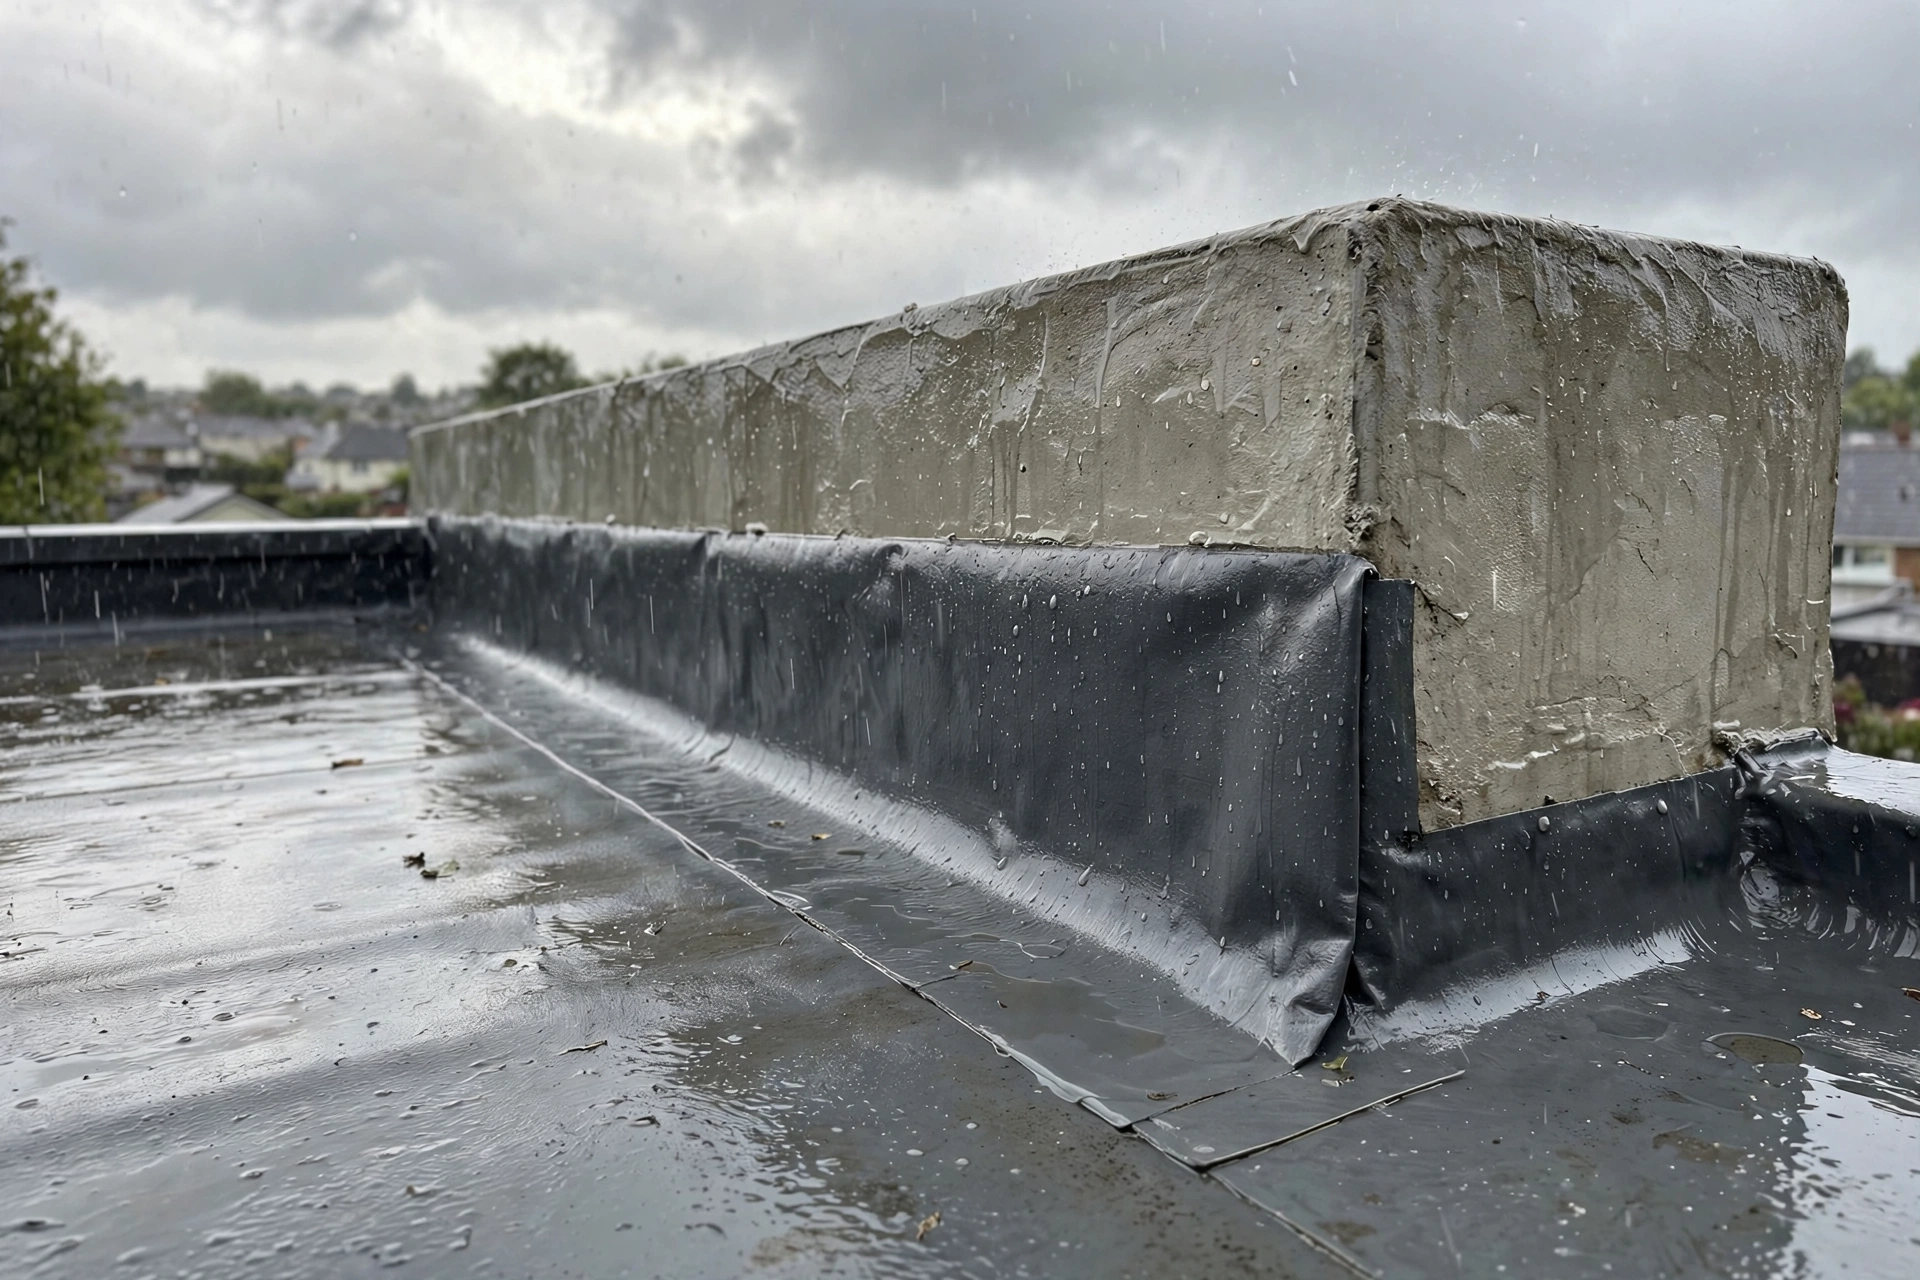
On a residential flat roof, the parapet wall — the low wall rising around the roof edge — is the most common source of leaks. a parapet faces rain, wind, and sun on three sides at once, exactly where the roof membrane must make its hardest transition, from horizontal to vertical.
Reliable parapet waterproofing is a layered assembly: carry the roof membrane at least 8 inches (200 mm) up the inside face of the parapet, reinforce corners with membrane gussets, seal the membrane's top edge with a metal counter flashing or reglet-and-mastic termination, cap the wall with a sloped coping with drip edges on both faces, and keep scuppers clear so water never ponds against the wall. Each layer backs up the one below it.
Why Parapet Walls Leak More Than Any Other Part of a Flat Roof
With no overhang to shield them, parapets take wind-driven rain directly on the exterior face while ponding water presses against the interior face during heavy storms. The wall and the roof deck also move at different rates as temperatures swing, and that differential movement works every joint at the roof-to-wall junction like a hinge.
Water entering a parapet rarely appears where it got in. It travels through masonry cores and cavities, then emerges as a ceiling stain feet from the roof edge — sometimes a story below. That is why patching the visible stain fails: the entry point is at the parapet, and the fix belongs there.
The Five Layers of a Properly Waterproofed Parapet
Think of parapet waterproofing as five layers working together. Miss one, and the rest do work they were never designed for.
- Membrane upstand: the roof membrane continues up the inside face, forming one unbroken barrier from the roof field to above any standing water.
- Base flashing: sheet metal or reinforced membrane covers the inside corner where roof meets wall.
- Counter flashing and termination: metal lapped over the membrane's top edge, or a reglet sealed with mastic, keeps runoff from getting behind the membrane.
- Coping: the cap sheds water to both sides and shields the assembly, overhanging each face slightly with drip edges.
- Drainage: scuppers, gutters, or overflow drains move water off the roof so it never ponds against the parapet.
Low-slope waterproofing standards call for membrane flashing at least 200 mm (about 8 inches) above the finished waterproofing membrane on vertical surfaces, and not less than 100 mm (about 4 inches) above finished surfaces like pavers. Treat those as minimums — higher is better.
Residential Parapet Wall Waterproofing Details That Prevent Rainwater Penetration
Membrane Upstand Height and Corner Treatment
The most important measurement in parapet waterproofing is how far the membrane runs up the wall. Water ponds inches deep against parapets in cloudbursts, and wind pushes it higher. An upstand stopping at 4 or 6 inches can be overtopped in a single bad storm. Aim for a sealed height of at least 8 inches above the finished roof surface.
Membranes dislike sharp bends, so install a cant strip or fillet where deck meets wall, letting the membrane sweep up on a smooth curve. Reinforce every corner with membrane gussets (roughly 4 by 6 inches), run vertical flashing in two bonded plies, and lap at least 3 inches with water flowing over each lap.
Base Flashing and Counter Flashing
Sheet metal base flashing belongs over the membrane at the roof-to-wall junction, covering the inside corner completely. On tall parapets where membrane flashing stops partway up, protect the exposed upper wall with self-adhered modified-bitumen underlayment of at least 40 mils (about 1 mm) — plain roofing felt is not acceptable.
Counter flashing is the metal shield lapped over the top edge of the base flashing, stopping wall runoff from sneaking behind the membrane. On masonry parapets this is often a reglet flashing: a narrow groove cut into the wall with the flashing's top edge locked in and sealed with compatible mastic.
Reglets and Termination Bars
A reglet is the professional's preferred termination on masonry. The groove is cut at the right height, the membrane's top edge is tucked into it nearly horizontally, and the joint is sealed — so water running down the wall cannot work behind a weakened adhesive bond.
Where a reglet is impractical, a termination bar is the accepted alternative: a rigid metal strip fastened through the membrane into the wall just below the coping, compressing the top edge, with a continuous sealant bead along its leading edge. Prime masonry first and roll self-adhered membranes firmly.
Coping That Actually Sheds Water
Coping does more waterproofing work than most homeowners realize. A proper coping slopes so water sheds to both the roof side and the exterior face, overhangs each face slightly, and carries a drip edge — a small downward lip that throws dripping water clear instead of letting it curl back down the wall.
Common options include formed aluminum or stainless steel, precast concrete, and natural stone. Never fasten through the top of the coping: use cleats with fasteners on the vertical faces only, with neoprene washers — top screws back out with thermal movement and become leaks. The membrane should wrap up and over the wall, terminating on the back side beneath the coping.
Scuppers and Overflow Drainage
Even perfect flashing cannot survive standing water. Keep scupper openings clear of leaves and debris — a blocked scupper turns the roof into a bathtub with the parapet as its dam.
If the roof uses interior drains, add overflow scuppers set slightly above the primary drain level. When the primary drain clogs mid-storm, the overflow gives water an escape before it rises high enough to overtop the membrane upstand.
Comparing Waterproofing Systems for Residential Parapets
Match the system to your existing roof membrane — mixing incompatible chemistries without an approved transition detail causes premature flashing failure.
Step-by-Step: Retrofitting an Existing Parapet
The sequence matters — each step prepares the next.
Inspect and document the full perimeter: blistered membrane at the wall base, cracked or shifted coping, rust streaks, open sealant joints, and interior stains. Photograph everything.
Strip failed materials. Remove loose coping, failed sealant, and delaminated membrane. Never layer new membrane over blistered, unbonded material.
Prepare the substrate: clean the wall face, repair spalled masonry, and prime all masonry with the manufacturer's approved primer.
Install the membrane upstand: set the cant strip, run membrane at least 8 inches up the wall in two bonded plies, add corner gussets, and lap 3 inches minimum.
Set the counter flashing or termination: cut and seal the reglet, or install the termination bar with a continuous sealant bead.
Install or reset the coping: slope it to shed both ways, confirm overhang and drip edges, fasten on vertical faces only with neoprene-washer fasteners.
Clear and test drainage: clean every scupper and drain, then hose-test and watch the parapet base and interior for entry.
Warning Signs Your Parapet Waterproofing Is Failing
Parapet problems announce themselves well before water pours through a ceiling:
- Interior stains or peeling paint on walls just below the roof edge — or mysteriously far from it.
- White powdery efflorescence or flaking, spalling masonry on the parapet's exterior face.
- Rust streaks below coping or flashing, signaling metal deterioration.
- Blistered, lifted, or cracked membrane where the roof meets the wall.
- Coping that has shifted, lifted, or lost its sealant joints.
- A musty smell in rooms below the roof edge after rain.
Common Mistakes That Cause Parapet Leaks
Most parapet leaks trace back to a short list of detailing errors — check these in any contractor's proposal:
- Stopping the membrane upstand too low, below the level water reaches in a heavy storm.
- Terminating membrane with sealant alone — no reglet, termination bar, or counter flashing.
- Fastening through the top of the coping instead of using cleats on the vertical faces.
- Coping with no overhang or drip edge, so water runs straight down the wall face.
- Skipping corner gussets, leaving the highest-stress points single-ply.
- Laps oriented so water flows against them instead of over them.
- Letting scuppers clog, so water ponds against flashing never meant to sit submerged.
What Parapet Waterproofing Costs
Costs vary with roof size, parapet height, access, and region — treat every figure as a rough estimate, not a quote. A localized repair to one short run often falls in the low hundreds of dollars; re-flashing a full run typically lands in the low thousands. Full-perimeter coping replacement or a complete re-detail can reach the mid-to-high thousands — metal coping costs less than stone or precast, which lasts far longer.
Get at least two detailed proposals naming the membrane system, upstand height, termination method, and coping material. A quote that just says 'waterproof parapet' without those details is a red flag.
Safety and When to Call a Professional
Parapet work happens at the roof edge, so fall protection comes first — a low parapet is not a guardrail. Torch-down application involves open flame and belongs strictly to trained, insured roofing professionals.
Call a roofer when the membrane upstand needs replacement, coping must be removed and reset, you see structural movement or serious masonry deterioration, or leaks persist after basic maintenance. Sealant renewal and scupper clearing are reasonable DIY only when the underlying flashing is sound and you have proper fall protection.
Final Thoughts
Parapet waterproofing succeeds on a handful of details: membrane carried high enough, reinforced corners, a terminated top edge, coping with real drip edges, and drainage that never lets water stand against the wall. None is expensive alone; together they separate a roof edge that works for decades from one feeding a hidden leak into the rooms below.
Your next step is simple: after the next heavy rain, walk the roof perimeter and check the base of every parapet. Staining, blistering, shifted coping, or clogged scuppers are cheap to fix now — and expensive to ignore.
Frequently Asked Questions
How high should waterproofing go up a parapet wall?
At least 8 inches (200 mm) of sealed membrane above the finished roof surface, and not less than 4 inches above finished surfaces like pavers. Go higher where ponding occurs — wind-driven water rises well above the normal waterline in storms.
Can I just coat my parapet with waterproof paint?
A coating works as a maintenance topcoat over sound flashing, but it cannot fix failed details. If the upstand is too low, the termination is open, or the coping is wrong, paint hides the problem while water keeps entering behind it. Fix the detailing first, then coat for UV protection.
What is coping and why does it matter so much?
Coping is the cap on top of the parapet. The wall top is fully exposed to rain, and without a sloped, overhanging cap with drip edges, water runs down both faces straight into the flashing terminations below. Much of what looks like a flashing leak is actually a coping problem.
Why does my ceiling leak far from the parapet wall?
Water entering a parapet travels inside the wall — through masonry cores and cavities — and can emerge feet away, even a story below. That hidden travel is why repairs should target the parapet detailing, not the spot where the stain appeared.
Do I need scuppers if my flat roof already has drains?
Interior drains handle normal rain, but every flat roof needs an overflow path — typically overflow scuppers set just above the primary drain level. When the primary drain clogs mid-storm, the overflow gives water an escape before it overtops the membrane flashing.
How long does parapet flashing last?
A properly detailed modified-bitumen or single-ply assembly typically lasts as long as the roof membrane — often 15 to 25 years — while sealant-only terminations may need attention within 5 to 10 years. Stone or precast coping can outlast the roof; metal needs periodic fastener checks.
Can a homeowner redo parapet flashing themselves?
Clearing scuppers, renewing sealant beads, and recoating sound flashing are reasonable DIY with proper fall protection. Full membrane re-flashing, coping removal and reset, and any torch-down work belong to a licensed roofer. When in doubt, pay for an inspection first — finding the real entry point is the highest-value step.