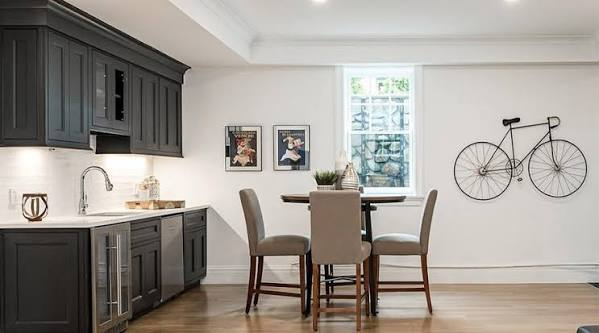
A basement without a proper exit window feels like storage, no matter how nicely you finish it. It is darker, harder to heat and cool evenly, and in most places it cannot legally count as a bedroom or living space. An egress window changes all three problems at once. It gives anyone sleeping or working below grade a real way out in a fire, it gives firefighters a way in, and it floods a level that normally relies on small hopper windows with genuine daylight.
Done well, this is one of the highest-return basement projects you can plan. Done poorly, it becomes an expensive hole that leaks, fails inspection, or still leaves the room gloomy. The difference is planning: get the code numbers right first, choose the right window and well, and design the room around the light.
Egress Code Requirements You Must Get Right First
Egress rules come from the International Residential Code, which most US towns adopt with small local changes. Confirm the details with your building department before you cut concrete, because an inspector measures the finished opening, not the box the window came in. A window that looks large enough can still fail if the frame or sash reduces the usable space.
For a basement bedroom or living area, the core requirements are consistent in most jurisdictions:
- Net clear opening of at least 5.7 square feet, reduced to 5.0 square feet for a ground-floor or below-grade opening in some adopted versions — check your local rule
- Minimum clear opening height of 24 inches and minimum clear width of 20 inches, measured with the window fully open
- Sill no more than 44 inches above the finished floor, so a child or older adult can climb out without a stool
- Window must open from inside without keys, tools, or special knowledge, and without removing a separate sash or storm panel
- Window well at least 9 square feet, with a minimum projection and width of 36 inches in each direction
Wells deeper than 44 inches need a permanently attached ladder or steps that do not block the opening. You will also need a permit in almost every town. Budget $75 to $300 for permits and plan for one or two inspections, including a check of smoke and carbon monoxide alarms for a new bedroom.
Choosing Window Size and Type for Exit and Light
Size above the minimum. A window that only just passes code gives you little extra glass, while going 20 to 30 percent larger costs little more once the foundation is already cut. A 36-by-48-inch casement, for example, clears the minimum comfortably and brings in roughly twice the light of a small slider.
Which Window Style Works Best?
Casements are the favourite for egress because the whole sash cranks open, so almost the entire frame becomes exit space. Sliders only open halfway, so they must be much wider overall to pass, and double-hung windows have the same problem in height. Awning windows rarely open wide enough unless they are very large.
- Casement: best clear opening per size, strong seal, typical cost $500 to $1,200 for the unit
- Slider: simple and affordable at $400 to $900, but needs a wide wall opening to meet code
- Single-hung or double-hung: familiar look, but plan on a tall unit so the open half still clears 24 inches
Choose double-pane, low-E glass in an insulated vinyl or fiberglass frame. The upgrade adds perhaps $100 to $200 and prevents condensation and winter chill. Avoid bars or fixed grilles that cannot be released instantly from inside.
Planning the Window Well So Escape Feels Easy
The well is not just a hole outside the window. It is the second half of the exit. A cramped, dark well makes escape harder and blocks much of the light you paid for, so give it more room than the 36-inch minimum if your yard allows it. A well 44 to 48 inches wide and projecting 36 to 42 inches from the foundation feels noticeably safer and brighter.
Prefabricated steel or fiberglass wells cost $300 to $800 and install quickly. Built wells in concrete or stone look better and allow terraced steps, but cost $1,500 to $3,500. Terraces suit a deep basement: wide steps are easier to climb than a vertical ladder, especially for children.
Add a clear polycarbonate cover only if it lifts easily from inside and outside without tools. A heavy or locked cover will fail inspection and defeats the purpose.
Light Maximization Strategies That Actually Work
A bigger window does not automatically mean a brighter room. Direction, well finish, and what sits in front of the glass matter just as much. If you have a choice of walls, pick the south- or west-facing wall for the strongest daylight, and avoid placing the only egress window under a low deck or dense tree canopy if another wall is available.
- Use a light-coloured well: white or pale galvanized finishes reflect far more daylight down than dark soil or black plastic
- Widen the well at the top or terrace the sides, so the opening works like a funnel for low winter sun
- Keep shrubs, fences, and stored items at least 3 feet back from the well so they do not shade the glass
- Choose glass with a high visible transmittance rating and skip heavy tints or frosted panes on the main egress window
- Angle or paint the interior wall beside the window in a light colour to bounce light deeper into the room
Inside, an open plan, a glass-panelled door, or a half-wall lets that one strong light source serve a hallway or second room as well.
Drainage and Waterproofing to Prevent a Costly Leak
Most leaks blamed on the window actually start in the well: rain fills it faster than soil can absorb it, then presses against the seal. Plan drainage before the window goes in, not after the first storm.
Connect the base of the well to your foundation drain or a gravel pit. Set the window on a sloped, flashed sill, seal the frame with backer rod and exterior sealant, and add flashing tape. Inside the well, 8 to 12 inches of clean drainage stone over landscape fabric keeps the base from turning to mud.
- Slope soil and paving away from the well at roughly 1 inch per foot for at least 3 feet
- Connect the well drain to the footing drain or a sump where code allows; never leave a deep well with no outlet in heavy clay soil
- Test with a hose before backfilling: fill the well partway and confirm it empties within an hour
- Recheck exterior sealant each autumn and clear leaves that can dam water against the glass
Professional waterproofing and drainage typically add $400 to $1,000 to the project. That is cheap insurance when a finished basement repair after flooding can easily exceed $5,000.
Layout and Furniture Planning Around the Exit
Once the window is in, protect both its jobs: exit and light source. Building code expects a clear path to the window, and good design expects the same. Keep the floor area directly in front of the window free of fixed joinery, tall bookcases, or a bed headboard pushed tight against the sill.
In a bedroom, place the bed on the side wall rather than under the window, so the sleeper can reach the exit without climbing over furniture. In a family room, low seating under the window works well: a sofa back below sill height preserves light and still leaves a step-up route.
Do not let a gym rack or storage system creep across the window over time. Once a year, open the window fully and climb into the well to confirm nothing blocks you — it takes five minutes.
Finishing Touches for a Bright Basement
Paint walls in a warm white or pale neutral with a light reflectance value of 70 or higher, and use the same tone on the window reveal so the opening looks larger. A satin or eggshell finish reflects a little more light than flat paint.
Layer lighting for evenings: ceiling lights, a lamp near seating, and a low night-light on the route to the window. Choose blinds or a sheer curtain that pulls fully clear in one motion. Blackout curtains are fine on a wide track that uncovers the whole window instantly.
Finally, finish the well itself with pale stones and a clean cover. A pleasant view encourages you to keep curtains open and enjoy the light you invested in.
Final Thoughts
A basement egress window succeeds when code, daylight, and drainage are planned together. Start with the measured opening and well size, choose a casement or generously sized window, give the well room and a real drain, and arrange the room so the exit and the light both stay clear. Expect a total installed cost of roughly $3,000 to $7,500 for a professional job with excavation, cutting, window, well, and finishing, and less if you handle interior finishing yourself. The reward is a lower level that is safer, legal to sleep in, and pleasant to use every day — not just in an emergency.
Frequently Asked Questions
Does every basement need an egress window?
Not every basement, but every basement bedroom does in most codes, and any finished living space strongly benefits. If anyone sleeps downstairs, treat egress as required and confirm the rule with your building department before finishing the room.
How much does a basement egress window cost in total?
Most homeowners pay $3,000 to $7,500 installed, including excavation, foundation cutting, the window, well, and drainage. A replacement in an existing large opening costs far less, while deep wells, terraced stone, or difficult access can push the total above $8,000.
Can I make an existing small basement window compliant?
Sometimes, if the foundation opening can be enlarged downward to lower the sill and widened for the clear opening. Many small hoppers cannot be saved because the total opening is too small, so a new cut below the old window is usually the practical route.
Do I need a ladder in the window well?
Only when the well is deeper than 44 inches. The ladder or steps must be permanently fixed, usable when the window is open, and must not reduce the required clear opening or well space. Terraced steps count if they meet your local code.
What window coverings are safe for an egress window?
Use blinds, shades, or curtains that open fully in one easy motion without tools, keys, or excessive force. Avoid fixed bars or locked covers. Test the covering from a lying position in bed, not just standing, to be sure anyone can clear it quickly.